


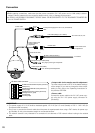
Installation
Before starting installation/connection, make sure that the power cable is not connected to the main power supply.
Refer to the “Precautions for installation” section before starting installation/connection. (☞ Page 13)
Step 1
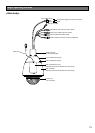
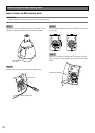
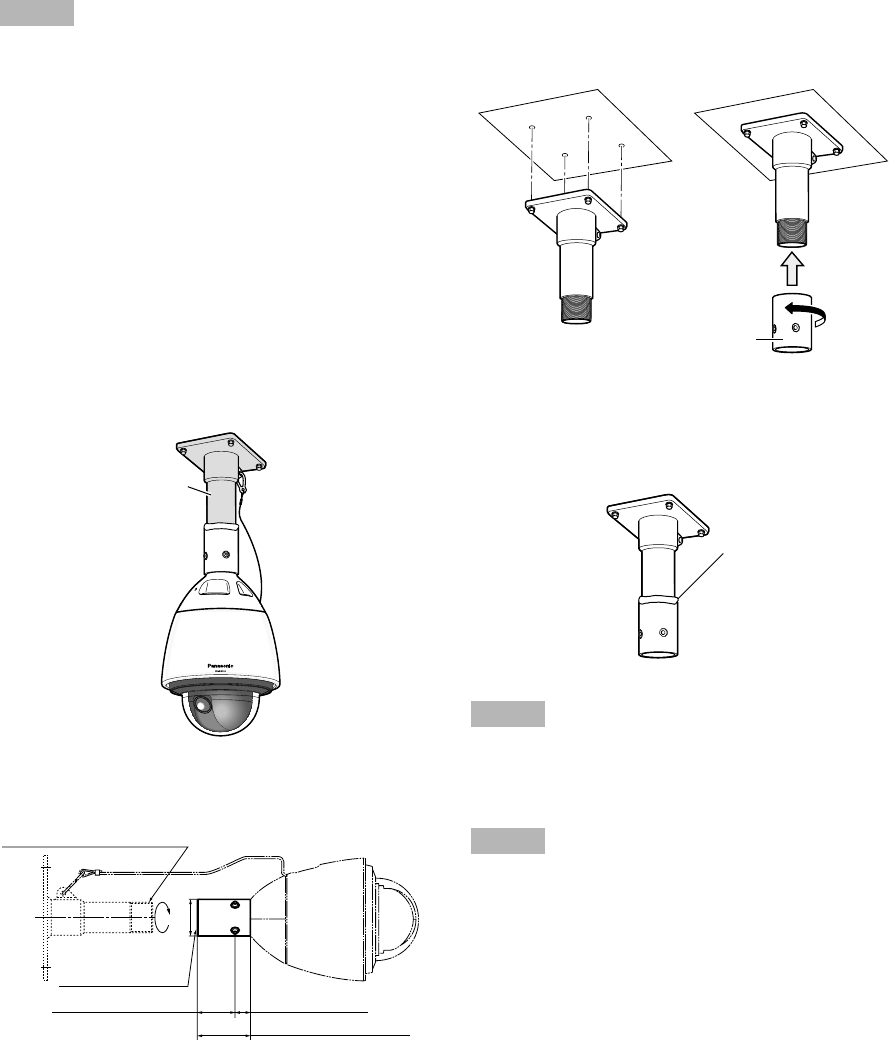
Install the mounting bracket.
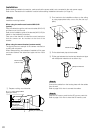
When using the wall mount bracket WV-Q122
(option).
Pass the cables through the wall mount bracket (WV-Q122)
and then mount it to the wall.
Refer to the installation guide of the bracket (WV-Q122) for
details on the installation procedure.
Take care of the direction to install the mount bracket so
that the camera can be mounted at the front of the
bracket.
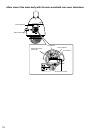
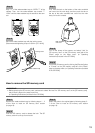
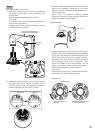
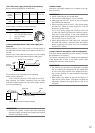
When using the mount bracket (custom-made).
The figure shows an example of the camera mounted on
a ceiling with a bracket.
When waterproofing, use waterproof material to fill in gaps
and holes between the attachment pipe and the mount
bracket.
q Prepare a ceiling mount bracket.
w Fix a bracket to the installation surface on the ceiling
by using appropriate bolts, nuts or the like (not sup-
plied).
Attachment pipe
e Fix the attachment pipe to the bracket.
r Fill the gap between the bracket and attachment pipe
with waterproof material such as silicon clay.
Waterproof material
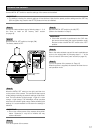
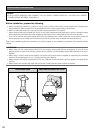
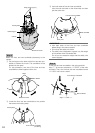
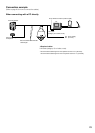
Step 2
Connect the cables from the housing base with the cables
from the wall.
Refer to page 26 for how to connect the cables.
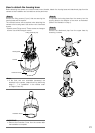
Step 3
Insert the SD memory card into the SD memory card slot.
Refer to page 18 for how to insert the SD memory card.
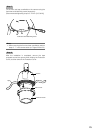
Mount bracket
(custom-made)
(fl58)
(60 mm {2-3/8 inches})
25 mm {1 inches}
85 mm {3-11/32 inches}
RP 1-1/2, 11 crest,
deep 30 MAX
(parallel pipe thread)
R 1-1/2, 11crest, deep 30 MAX
(taper pipe thread)
22