


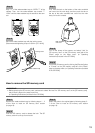
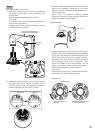
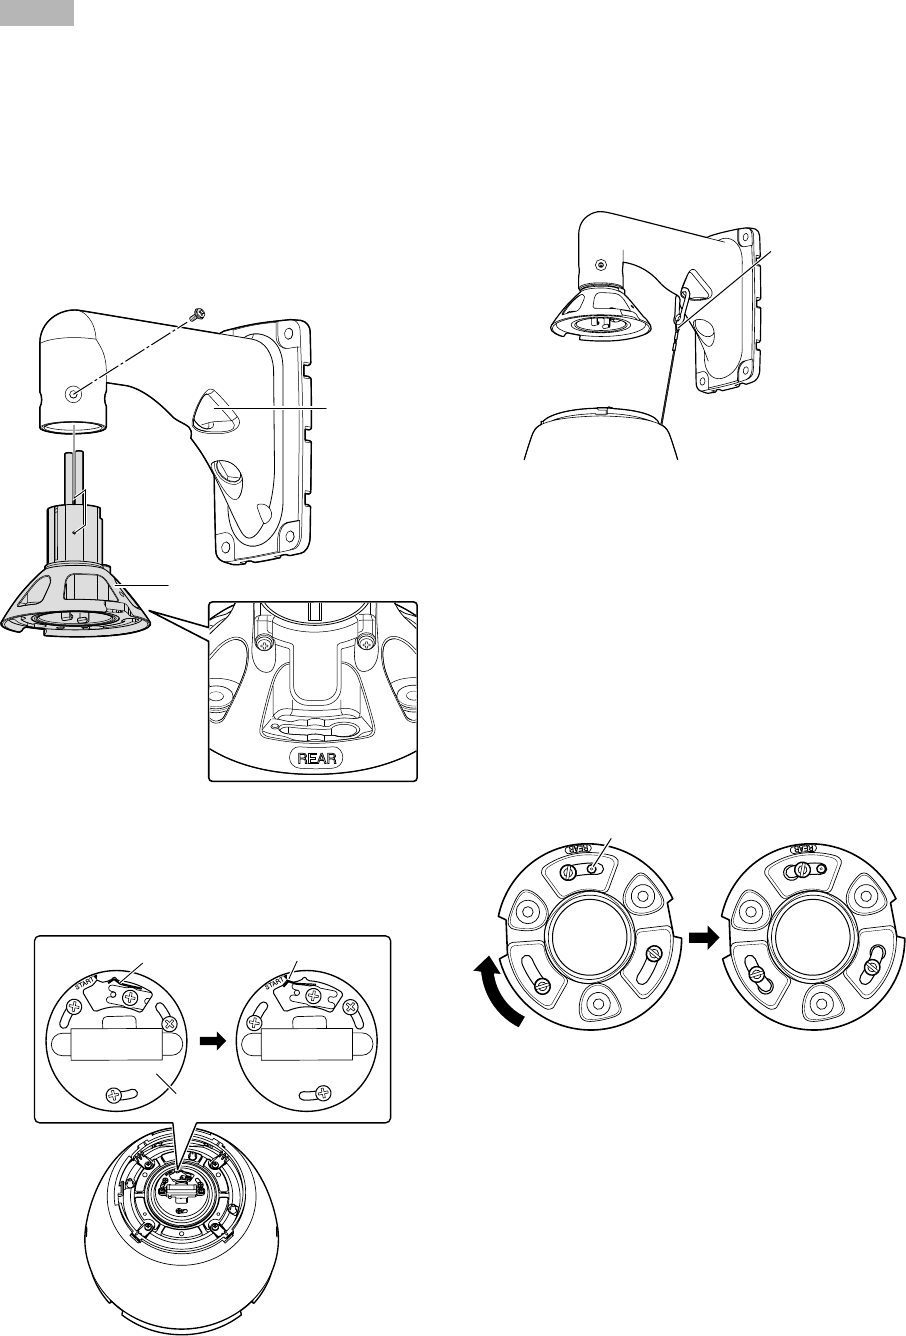
Step 4
Mount the camera to the bracket.
q Attach the housing base to the mount bracket using
the hexagon screws (M5, 4 pcs.) attached to the
housing base*.
(Recommended tightening torque: 2.45 N·m
{1.81 lbf·ft})
The “REAR” mark of the housing base shall be direct-
ed to the wire hook section.
* Special screw: These screws are hexagon screws.
Use an M5 hexagon wrench.
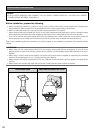
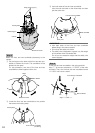
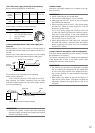
w Make sure that the projection of the plate spring on
the upper side of the camera is located on the
“START” position. If not, turn the plate clockwise to
locate the projection at the “START” position.
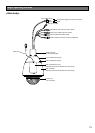
Plate
Plate spring Projection
Wire hook
section
Housing base
Hexagon screws (M5, 4 pcs.)
attached to the housing base
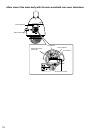
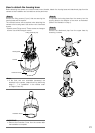
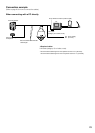
e Connect the safety wire (accessory) to the mount bracket.
Refer to the operating instructions of the mount
bracket for further information about where to con-
nect the safety wire.
When using the optional mounting bracket
(WV-Q122), connect the safety wire near to the cam-
era as shown in the example below.
<Installation example>
Safety wire
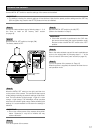
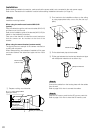
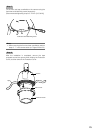
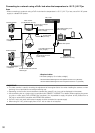
r Attach the camera to the housing base. When attach-
ing the camera to the housing base, the positioning
pin on the upper side of the camera shall be on the
“REAR” side. Make sure that the camera is securely
attached to the mount bracket by turning the camera
to the direction of the arrow as illustrated. Then,
secure the camera to the mount bracket with the
screws* removed when detaching the housing base.
(Recommended tightening torque: 2.45 N·m
{1.81 lbf·ft})
* Special screw (Fixing screw): These screws are hexa-
gon screws. Use an M5 hexagon wrench.
Positioning pin
Overhead view
When the camera is secured
to the mount bracket
When the camera is
attached
23