2. Configuring the desired IP address 30
Model 6081RC Network Access Server User Manual 3 • Initial configuration
Connecting and logging in via the Console port
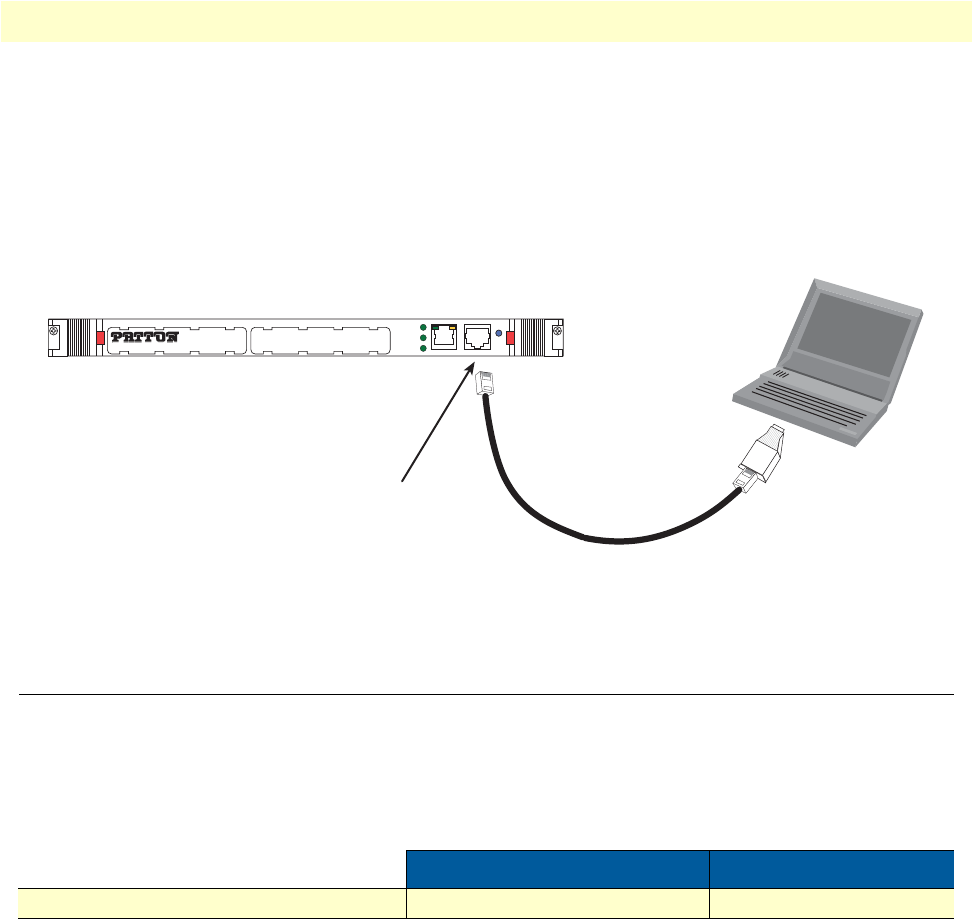
To access the 6081RC configuration via the Console port, connect the DB9-RJ45 adapter to the DB-9 serial
port on the PC or dumb terminal. Use the RJ45 straight-through cable between the adapter and the Console
port on the 6081RC. (see figure 12). Do NOT connect the device to the Ethernet LAN now. On the PC, start
a HyperTerminal session at 19200 bps, 8 data bits, 1 stop bit, no flow control, and no parity. Log into the unit
using the username admin. Leave the password field empty.
Figure 12. Connecting the 6081RC to your laptop PC via the console port
2. Configuring the desired IP address
Factory-default IP settings
The factory default configuration for the Ethernet interface IP address and network mask is listed in table 4. The
Ethernet interfacee is activated upon power-up.
If this addresse matches with those of your network, go to section “3. Connecting the 6081RC to the network”
on page 31. Otherwise, refer to the following sections to change the address and network mask.
Login
To access the 6081RC, start the Telnet application. Type the default IP address for the router into the address
field: 192.168.200.10. Accessing your 6081RC via a Telnet session displays the login screen. Type the factory
default login: admin and password: <blank>.
Table 4. Factory default IP address and network mask configuration
IP Address Network Mask
LAN interface Ethernet 0 (ETH 0) 192.168.200.10 255.255.255.0
6081RC
192.168.200.10
PC
Connect to Console port
DB-9 serial port
RJ45 to DB-9 adapter
MODEL 6081RC Network Access Server
PWR
1 2
L2 LINK
ENET
CONFIG
10/100 ENET
READY
