Polaroid Z340 Instant Digital Camera User Manual www.polaroid.com
Making Connections
You can print your images directly using a PictBridge compatible printer.
1 Turn on your Printer. Check that the printer is turned on,
there is paper in the printer, and there are no printer
error messages.
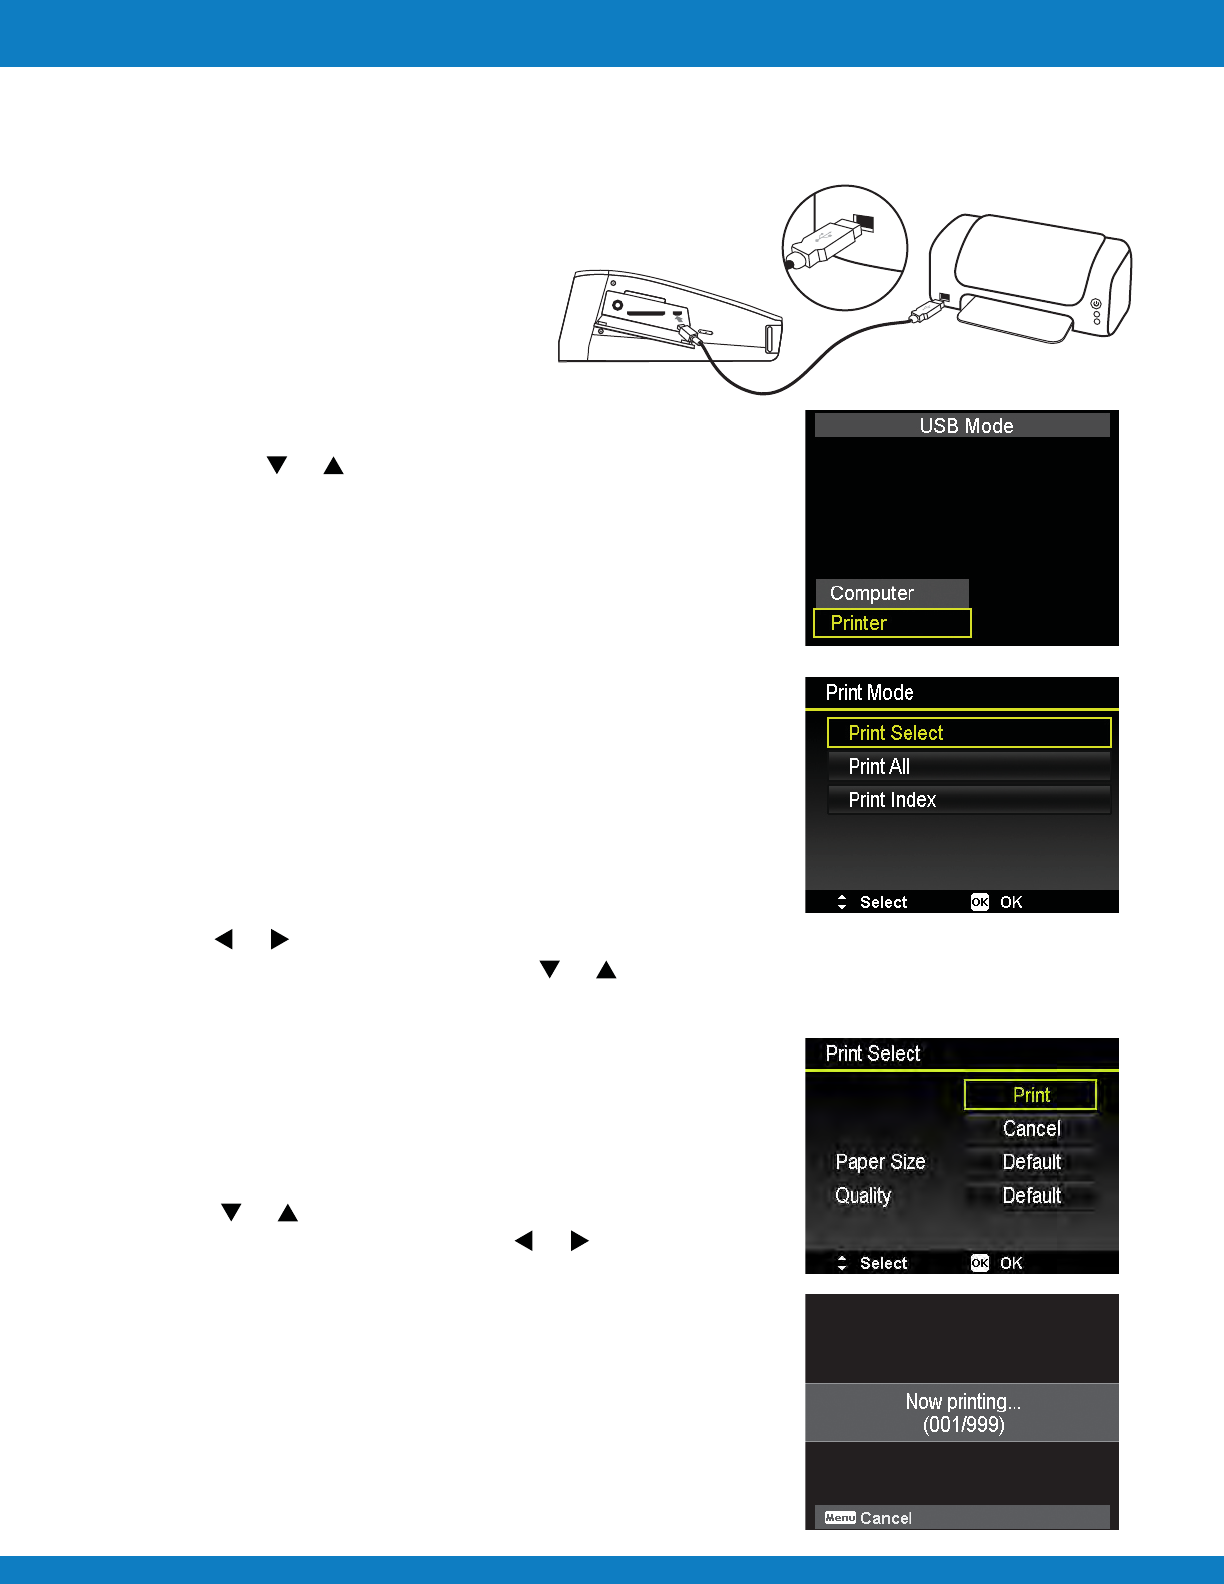
2 Connect one end of the USB cable to
the printer while the other end to USB
terminal on the camera.
3 The USB mode menu appears on the screen. Select Printer
by using the or key and press the OK button.
4 Enter the print mode and print the selected images.
For details on the following page "Setting the Print Mode Menu".
Connecting the Camera to a Printer
Print Mode menu appears on the screen after the connection
between a printer and your camera is established.
Print Mode includes three major settings:
• Print Select. An image can then be selected to print.
• Print All. Prints all images.
• Print Index. Prints all images as thumbnails.
To set Print Select
1 Use the or keys to scroll and select an image for printing.
2 Specify the number of copies. Use the or key to increase/decrease number.
3 Press the Function/Delete button to toggle between turning on/ off the date stamp.
4 Press the OK button to enter printer settings.
To set Print All and Print Index
Repeat the same steps 2 to 4, then enter printer settings.
To set Printer Settings
1. Use the or key to specify a print option.
2. Modify paper size and quality by the or keys.
Available setting:
• Paper size: Default / A4 / 4"x6"
• Quality: Default / Fine / Normal
3 Select Print on the screen for printing.
Or Cancel to go back Print Mode.
Start Printing
• LCD monitor appears "Now printing…".
• Or press Menu button to stop printing anytime.
Printing to an External Printer
EN-59


