


51
Optional Color Enhancement Light
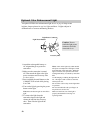
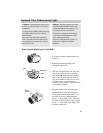
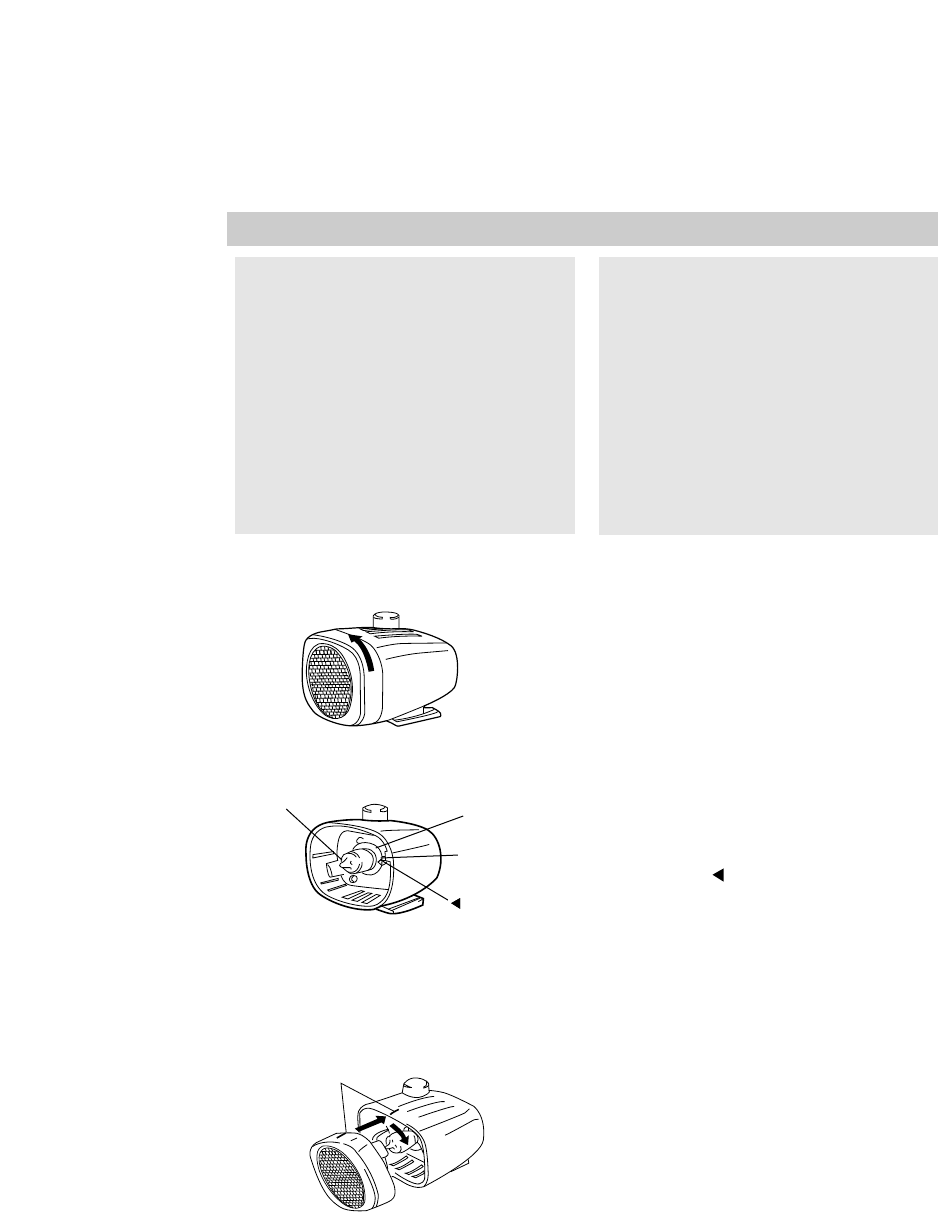
1. Turn the case front counterclockwise to
remove it.
2. Remove the bulb by pulling it out
through the open case.
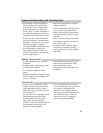
3. Hold the new bulb with a soft cloth and
align the notch in the rim of the bulb’s
base with the mark outside the socket.
Note: When replacing the light’s bulb, use
only Stock #VLB04 to reduce the risk of fire
and other hazards. See the installation
instructions packed with the replacement bulb
when replacing the bulb.
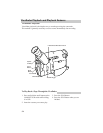
4. Reattach the case front by placing the
bulb in the hole of the reflective plate,
lining up the smaller raised mark (–) on
the front of the cover with the raised
mark (—) on the light’s case. Then turn
the front clockwise until the larger raised
mark (—) on the front cover aligns with
the mark on the case.
Cautions: After using the light, be sure
to allow it sufficient time to cool down
completely.
Use only bulb (VLB04) when replacing
the bulb to reduce the risk of fire or
other hazards.
Do not use the light when powering
your camcorder with the optional car
cord adapter because the car cord will
become very hot.
Dangers: During operation and after
using the light, the front surface and
bulb of the light will be very hot. To
avoid burns, do not touch them.
To prevent overheating, do not block
or cover the ventilation holes on the
color enhancement light.
Never use the light in the vicinity of
explosives or highly flammable
materials.
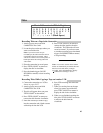
Removing and Replacing the Light Bulb
Bulb
Bulb Base
Notch
Raised
Marks (—)
Mark