Software Resolution Length ( Max )
CorelDRAW7 600dpi 1263.5mm
300dpi 2650mm
150dpi 3276.7mm
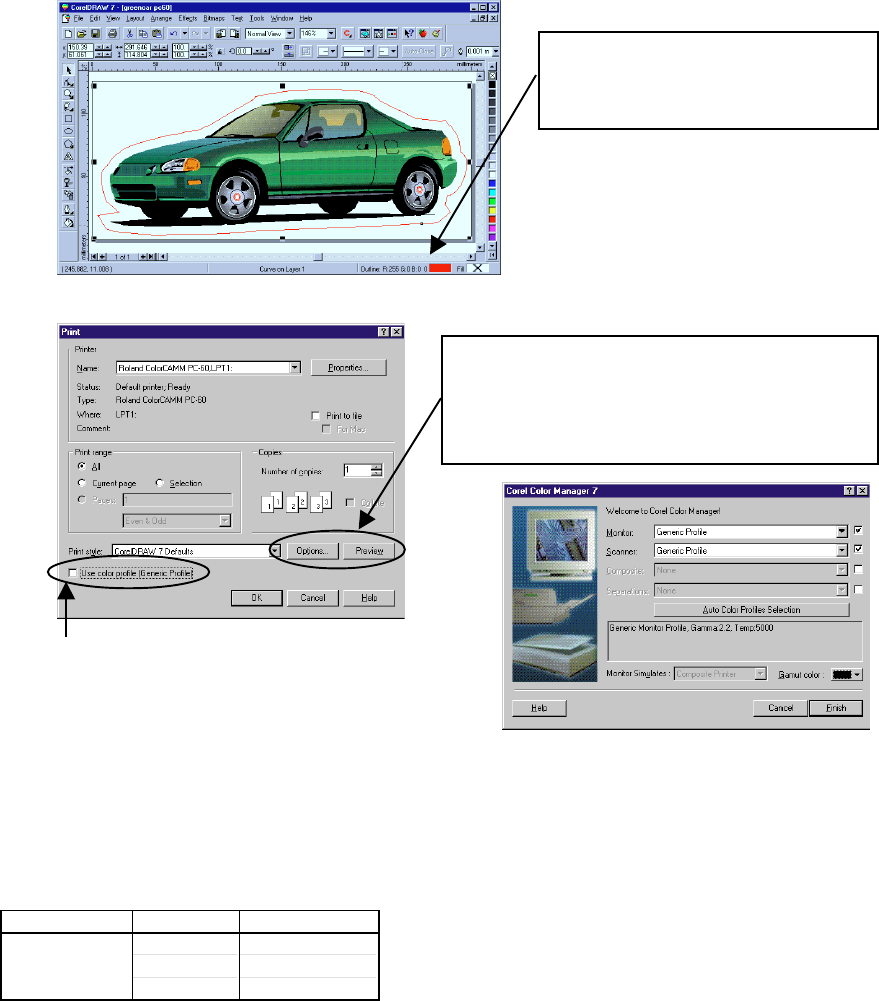
Make sure that the settings of the
[Outline Tool] is done correctly at the
lower right corner.
Open the [File] --> [Print] in CorelDRAW 7 and enter the Print Dialog.
Image can be checked whether it is inside the
page or not by clicking [Preview]. By setting the
values of [Top] and [Left] in the [Options] to 0,
the margin can be set to 0.
Make sure not to select the [Use Color Profile]. If it
is selected, cutting can not be done.
[Use Color Profile] will not be selected if [Conposite]
and [Separation] are not selected, as shown in above
right figure, by entering the [Tool] --> [Color Man-
ager] in CorelDRAW 7.
<NOTE>
1. The length which can be printed from CorelDRAW 7 is described in the following table.
Sometimes the photo data (especially, BMP files such as TIFF data over 15Mbyte) can not be
printed with the desired resolution even the length is within the possible range. In this case, please
lower the resolution with Corel PHOTO - PAINT 7 or Adobe Photoshop to make the file size smaller.
2. In case the size of the image is more than the Plot Area of PC-60 (571.6mm) and includes charac-
ters, please rotate the image in the CorelDRAW 7 to print. If there is a problem to print the charac-
ters, please outline them in the CorelDRAW 7 and try.
3. Postscript texture can not be printed.
4. Please accommodate the sheet in the using environment before using it.
5. There could be slight error in the distance accuracy in media feeding direction because of the me-
chanical tolerance.
6. There could be shifting in colors when printing more than 2m in length because the printing is done
by the repeated printing of YMCK.
