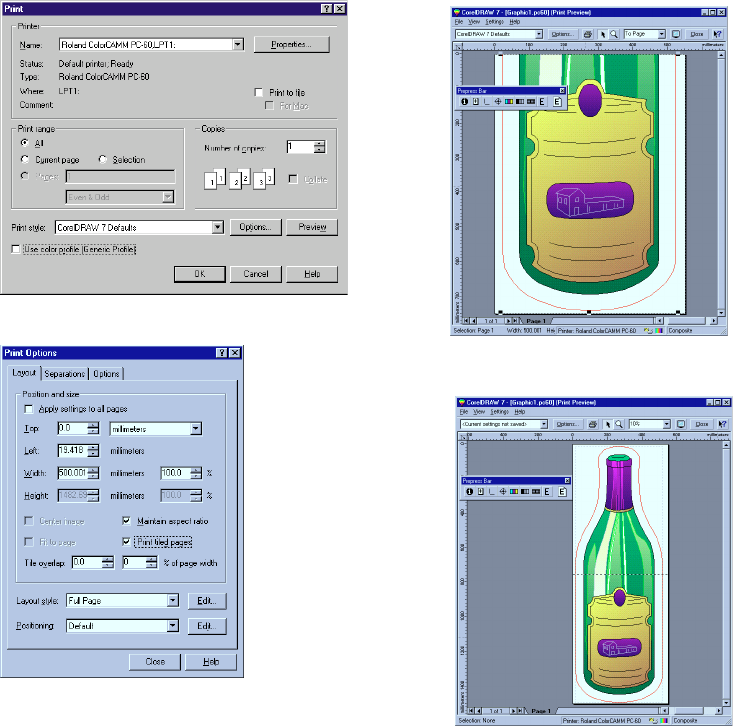
Click OK button after completing the above settings.
Click [Preview] from the Print Dialog.
After checking the image, click [Option].
Select [Print tiled page] and
click [Close] button.
Make sure that the image is devided as
show above.
To overlap the image at the center, open
the Print Option Dialog by clicking the [Op-
tion] to enter the values of [Bleed limit].
<Notes for Printing Tile Page>
1. Because the CorelDRAW 7 is a software made by Canadian Company, Corel Corporation, the con-
cept of the unit is in inches. And the data will be sent to PC-60 in dpi (dot per inch = number of dots
printed in 1 inch).
Therefore, the result of printing tile page would be more correct if working in inches than millimeters
at both application software and the Windows Driver.
2. Please note that the image being cut and print sometimes shifts slightly from the correct position.
3. Tiling can be done only in the media feeding direction and not in the carriage feeding direction.
<Other Notes>
Please refer to the <Note> in the section [How to Print from Adobe Illustrator 7.01 (Basic Operation)].
