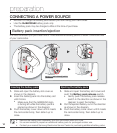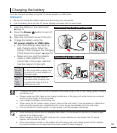
1. Insert the battery in the camcorder.
²
page 14
2. Press the Power
button to turn off
the camcorder.
3. Open the connector cover of the unit.
4. Charge the battery using the
AC power adaptor or USB cable.
The CHG (charge) lamp lights up
and charging starts. When the
battery is fully charged, the charging
(CHG) lamp turns green.
²
page 16
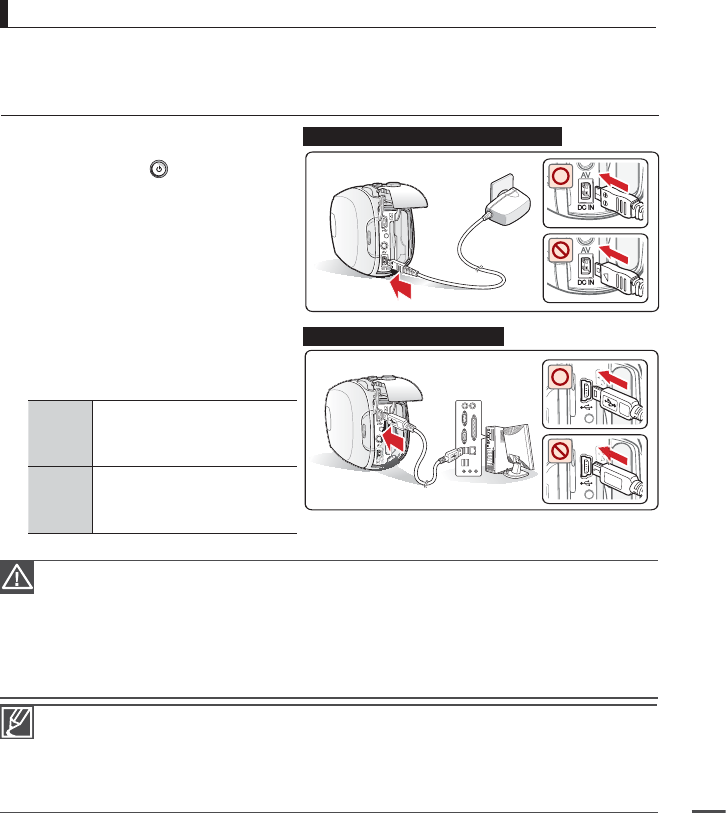
Make sure you plug the adaptor
cable or USB cable into the
camcorder in the proper direction.
See the
diagram
to the right.
Using
the AC
power
adaptor
Connect the AC power adaptor
to the camcorder properly and
plug the AC power adaptor in
the wall outlet.
Using
the
USB
cable
Connect the USB cable to
the camcorder properly and
connect the other end to a
USB port of a PC.
•
•
When recording indoors with an available wall outlet, it is convenient to use the AC power supply
instead of the battery pack.
When charging, if both the USB cable and AC power adaptor are connected, the AC power
adaptor will override the USB.
If the camcorder is turned on, the battery will still charge, but more charging time will be needed.
It is recommended you to keep the camcorder turned off while charging.
•
•
•
Charging the battery pack at low temperature may take longer or fail to fully charge (green indicator
will not turn on).
Please make sure that there are no foreign substances in the plug and socket when you connect
the AC power supply to the camcorder.
Fully charge the battery pack before use.
When using the AC power supply, place it close to the wall outlet. If you experience a malfunction
while using the camcorder, separate the AC power supply immediately from the wall outlet.
Do not use the AC power supply in a tight space, such as between furnishings.
•
•
•
•
•
Connecting the AC power adaptor
Connecting the USB cable
Wall Outlet
PC
PRECHECK!
Be sure to charge the battery before you start using your camcorder.
Use the battery pack and the AC power adapter provided with the camcorder.
•
•
Charging the battery
You can charge the battery using the AC power adaptor or USB cable.
15


