SPEED DOME CAMERA User’s Manual
29
ENGLISH
SPEED DOME CAMERA User’s Manual
28
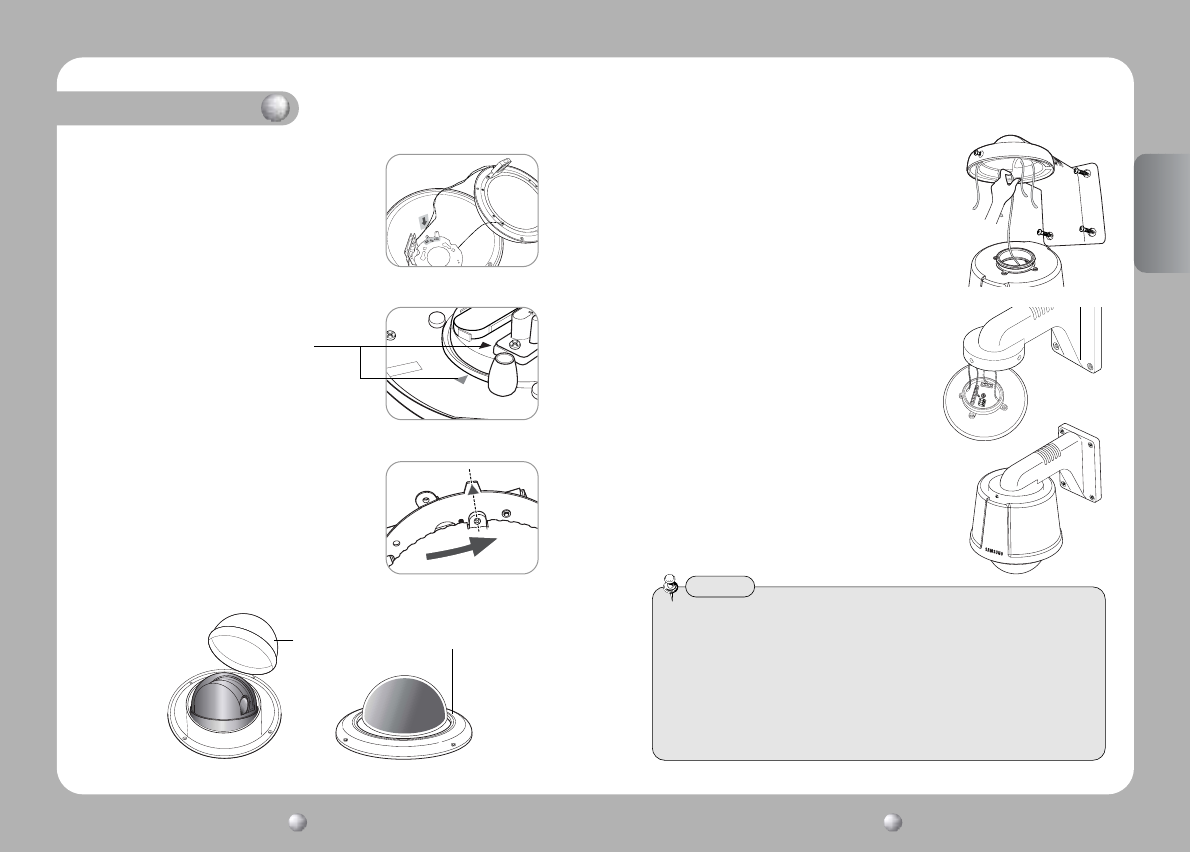
5. Connect the heater and fan cables within the
housing to the fan heater PCB.
8. Remove the camera dome cover and then attach the housing dome cover.
6. Adjust and make the arrows marked on
the bottom of the camera
body face each other.
an arrow
Camera Dome Cover
Housing Dome Cover
7. Insert the camera into the housing by matching
the installation pin on the bottom of the camera
and the arrow inside the housing, and then
fasten the camera by inserting into the fastening
hole, turning the screw clockwise for fastening.
9. Connect the housing safety wires to the fixture
inside the mount installed on the ceiling.
10. Connect the video cable, the controller cable,
the power adapter cable and ID cable to
the camera holder.
11. Check out the connection of all parts and
the camera and install the completed outdoor
housing on the ceiling mount.
• Check out the input voltage of the power adapter before connecting the power.
• For an installation without housing, the camera can be installed with installation
template, fastening the cable and screw provided separately.
• It is necessary to tighten the screw to prevent unfastening.
• If the screw to prevent unfastening is not tight, the camera installed may fall due to
vibration or shock from the environment.
• Set up the Camera ID, the Termination Resistance and the Protocol Selection
Switch before installing the outdoor housing on the ceiling type mount.
Notes
Installation


