


EN-22
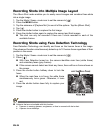
Setting the Panorama Mode
This mode is designed to make it easier to take a series of shots then stitch them
together with software to make a single image. You can capture a photographic subject
that won’t fit into a single frame, such as a landscape, and stitch it together later with a
program such as Arcsoft Panorama Maker
®
4.0 application.
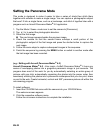
1. Tap the Mode / Scene mode icon to set the camera to [Panorama].
2. Tap e / f to select the photographic direction.
3. Shoot the first image.
The next image appears beside the previous image.
4. Orient the camera so that the second frame overlaps a small portion of the
photographic subject of the first image and press the shutter button to capture the
next image.
5. Follow the same steps to capture subsequent images in the sequence.
6. Finish the sequence by pressing the MENU button or switch to another mode after
the last image has been recorded.
(e.g.: Editing with Arcsoft Panorama Maker
®
4.0)
Arcsoft Panorama Maker
®
4.0 - Like magic, ArcSoft Panorama Maker
®
4 turns any
series of overlapping photos into a gorgeous panoramic image in just seconds. The
program does most of the work for you by automatically selecting an entire group of
pictures with one click, automatically organizing the photos into the proper order, then
seamlessly stitching the photos into a panoramic masterpiece that you can print, share
or post to the web. Create horizontal, vertical and 360° panorama pictures all within this
one amazing program.
To install software:
1. Insert the CD-ROM that came with the camera into your CD-ROM drive.
The welcome screen appears.
2. Click the respective software name.
Follow the on-screen instructions to complete the installation.