24
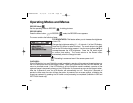
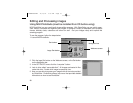
B. Use Menu button in Play Menu:
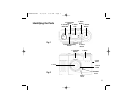
1. Set the Operating Mode Dial to the PLAY, then the last image appears.
2. Use the arrow buttons (▲/▼) to select the image you want for DPOF setting.
3. Press the Menu button, the Play menu appears.
4. Use the arrow buttons (▲/▼) to select DPOF item, then press OK button to confirm.
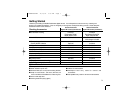
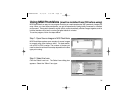
5. DPOF submenu will appear, and there are 4 items in this submenu, including Print Quantity, Print
Size, Print Index, and Print Enable. Use arrow buttons (▲/▼) to select one of 4 items, then press
OK button to confirm.
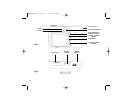
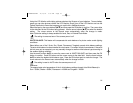
• If you select PRINT QUANTITY, use the arrow buttons (▲/▼) to make change, and then press OK
to confirm and return to the DPOF submenu. You can set the print quantity from 1 to 9.
• If you select PRINT SIZE, use the arrow buttons (▲/▼) to make change, and then press OK to
confirm and return to the DPOF submenu. You can set the print size from PRINT STD, 3X5, 4X6,
5X7, 8x10.(inch)
• If you select PRINT INDEX, use the arrow buttons (▲/▼) to toggle ON or OFF, and then press OK
to confirm and return to the DPOF submenu. You can select to print photo index or not.
• If you select PRINT ENABLE, use arrow buttons (▲/▼) to toggle ENABLE or DISABLE. If you
select “ENABLE” and press OK button to confirm, the camera will save the setting and returns to
Play menu. If you select “DISABLE” and press OK button to confirm, the camera will erase this
images DPOF setting and returns to Play menu.
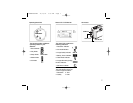
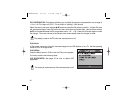
If your printer only supports DPOF version 1.0, you must set PRINT STD for the
“PRINT SIZE” option.
DPOF function can only be operated with CF card inserted.