


9
ENFORCER Mini PTZ Camera
SECO-LARM, U.S.A., INC.
a
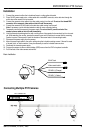
Installation
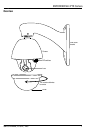
1. Connect the camera to either the included wall mount or other optional bracket.
2. Run a 24VAC power supply wire, a video cable with a male BNC connector, and a data wire through the
wall to where the camera is to be mounted.
3. Connect the camera's video cable to the video cable coming from the wall. Do not cut the female BNC
connector of the camera's video cable as that will void the warranty.
4. Connect the camera's RS-485 cable to the data wire cable coming from the wall.
Note: If necessary, use the included extension cable for more convenient wiring.
5. Temporarily connect the camera to the power supply. Do not cut the AC power terminal of the
camera's power cable as that will void the warranty.
6. Hold the camera's bracket against the wall or ceiling where it is
expected to be mounted, but do not mount
yet. While watching the monitor, operate the camera's pan and tilt functions to ensure that this mounting
location is correct. Use a pencil to mark the location of the screw holes in the mounting bracket.
7. Disconnect the power supply from the camera.
8. Mount the mounting bracket to the wall or ceiling using the included mounting screws. If the wall is made
of drywall, brick, or similar material, it may be necessary to use the included screw anchors.
9. Reconnect the camera's power supply.
10. Program the camera via the on-screen display (OSD) menus from the DVR or keyboard controller.
11. Do a final test of the video camera and monitor.
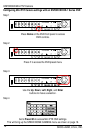
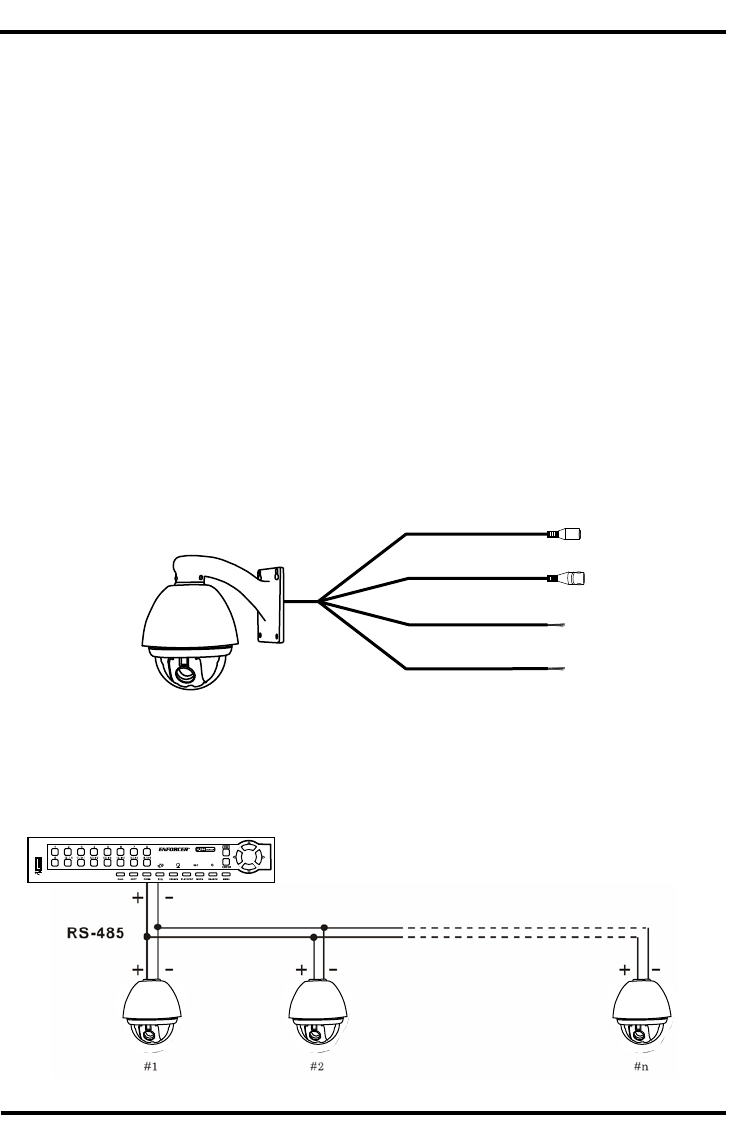
DR-1 Series DVR
Connecting Multiple PTZ Cameras
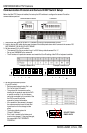
Basic Installation
24VAC Jack
Video coaxial cable
RS-485 (-) (Yellow)
RS-485 (+) (Orange)