


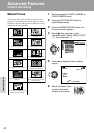


43
Useful Features
Camera Recording
Useful Features
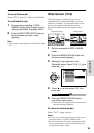
Auto Focus
The camcorder is preset to Auto Focus mode,
which is designed to focus on most types of
subjects. In Auto Focus mode, the camcorder
automatically focuses on whatever is in the
center of the scene. Always keep the subject in
the center of the scene.
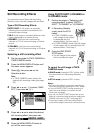
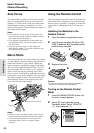
Tripod
Notes:
• If no subject is in the center of the scene, the
focus area will expand and the subject nearest
the center will be focused on.
• If no subject is displayed, the camcorder will
automatically zoom out until a subject comes
into the frame.
• Auto Focus may not work in the situations
described on page 47. In these situations, use
the manual focus function.
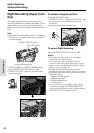
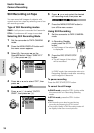
Macro Shots
This camcorder lets you shoot close-up images
of small objects such as flowers and insects, or
make title frames for your videos. When you
want to record a magnified image of a subject
which is within approximately 6 feet (1.8 m) of
the camcorder, do not zoom in on it. Instead,
zoom out all the way by pushing the Power
Zoom control to the W side, and then move the
camcorder closer to the subject until you obtain
the desired angle of view. The camcorder will
automatically focus on the subject when the
lens is set for the widest angle.
Notes:
• When you are recording a macro shot, be sure
that the subject receives sufficient illumination.
• It is recommended that you use a tripod for
recording macro shots, to prevent image
shaking.
Power Zoom control
Using the Remote Control
Use the supplied remote control to operate the
camcorder from a distance, such as when you
want to record yourself in a scene, or when the
camcorder is connected to a TV for use as a
VCR.
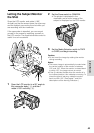
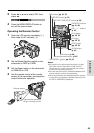
Installing the Batteries in the
Remote Control
1 Open the battery compartment cover.
2 Insert the two supplied AA (R6 or UM/
SUM-3) batteries with the battery poles
positioned as indicated.
3 Replace the cover.
Caution:
• Do not use old and new batteries together or
batteries of different brands together.
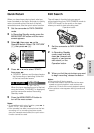
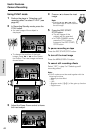
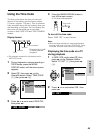
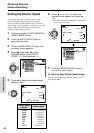
Turning on the Remote Control
Mode
1 Press the MENU/DISPLAY button until
the menu screen appears.
2 Select I, then press r on the
Operation button. Select “REMOTE”
(1), then press r (2).
12
REMOTE
SOUND
TIME CODE
TC OUT
DEMO MOD E
LANGUAGE
ON
OFF
OTHERS