64
Advanced Features
Darker Brighter
Picture/Backlight
Adjustments
If the picture is difficult to see due to ambient
lighting or other factors, adjust the monitor
picture settings.
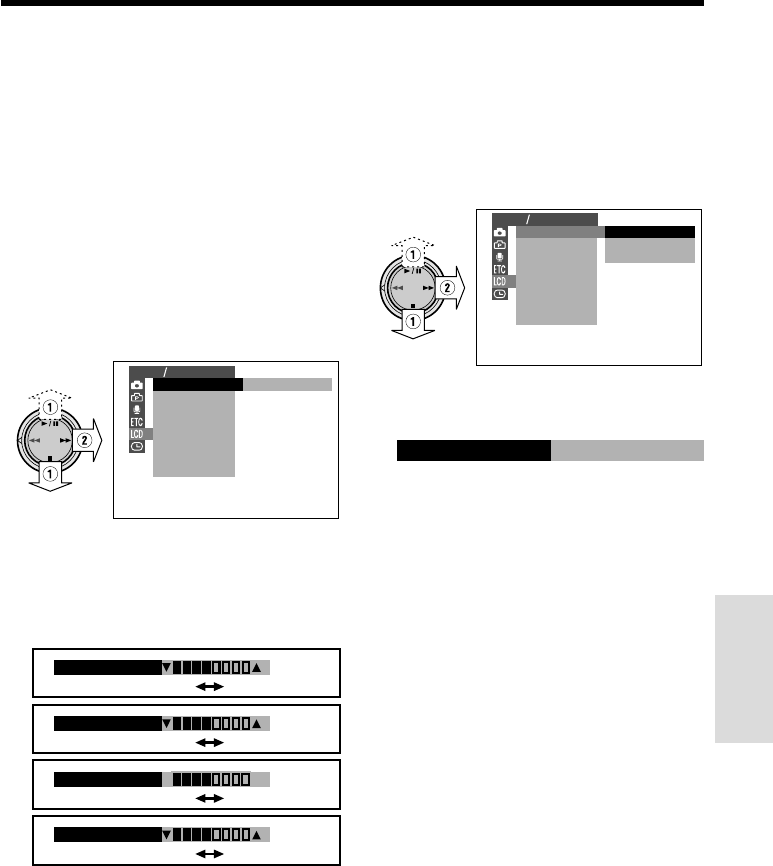
Adjusting the Picture
1 Press the MENU/DISPLAY button until
the menu screen appears.
• The example screens for this feature are for
TAPE-CAMERA mode.
2 Press d or y to select O (1), then
press r (2) on the Operation button.
3 Press d or y to select the item you
wish to adjust, then press r.
4 Press d or y to adjust the item to
the desired setting.
RG
LCD BRIGHT
VF BRIGHT
LCD COLOR
LCD TINT
Note:
• Close the LCD monitor to turn on the
viewfinder when adjusting the “VF
BRIGHT”.
Adjusting the Backlight
1 Press the MENU/DISPLAY button until
the menu screen appears.
2 Select O, then press r on the
Operation button. Press d or y to
select “BACKLIGHT” (1), then press r
(2).
NORMAL
BRIGHT
AUTO
BACKL IGHT
BRIGHT
LCD COLOR
LCD
VF
TINT
LCD VF SET
LCD BRIGHT
3 Press d or y to select “AUTO”,
“NORMAL” or “BRIGHT”, then press e.
BACKL IGHT
BRIGHT
AUTO: The camcorder automatically
switches between “NORMAL” and
“BRIGHT” depending on the ambient
lighting. This mode is only available in
TAPE-CAMERA or CARD-CAMERA
mode.
NORMAL: For use indoors or under
moderate lighting conditions.
BRIGHT: For use outdoors under strong
lighting conditions, such as bright
daylight.
4 Press the MENU/DISPLAY button to
turn off the menu screen.
AUTO
BACKL IGHT
LCD BRIGHT
BRIGHT
LCD COLOR
LCD
VF
TINT
LCD VF SET
Decrease Increase
Red Green
Darker Brighter
Note:
• When the color or tint is adjusted, the picture on
the LCD monitor may differ from the picture
actually recorded. Do not change the color and
tint settings unless it is necessary. (These
adjustments only affect the monitor picture, not
the recorded image.)
5 Press e, then press the MENU/
DISPLAY button to turn off the menu
screen.


