


65
Advanced Features
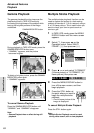
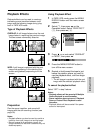
Playback
Advanced Features
Recording
Editing
Video editing lets you refine your videos by
removing unwanted sequences from your tape,
or transposing one sequence with another.
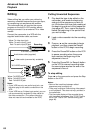
This camcorder lets you monitor the source
program on the built-in LCD monitor without
having to connect it to an external TV or video
monitor.
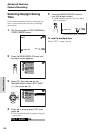
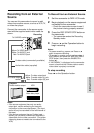
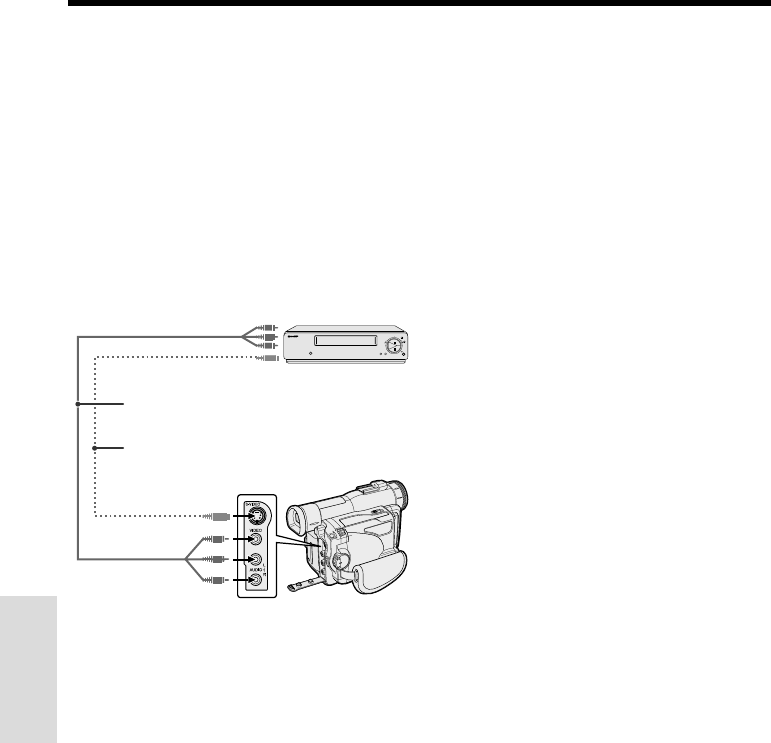
Connect the camcorder to a VCR with the
supplied audio/video cable, as shown.
Notes:
• If your VCR has only one audio input jack, use
the white plug for the audio connection on the
VCR.
• If your VCR has an S-video input socket, you can
use a commercially available S-video cable for
the video connection. (The yellow video plug
does not need to be connected to the VCR.)
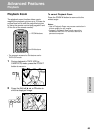
Cutting Unwanted Sequences
1 Play back the tape to be edited on the
camcorder, and locate the beginning
and end of the sequence you wish to
cut. Write down the time code reading at
the beginning and end of that sequence
(see page 46). Then, rewind the tape to
before the beginning of the portion that
you wish to keep.
2 Load a video cassette into the recording
VCR.
3 Press y on the camcorder to begin
playback, and then press the Record
button on the VCR to begin recording.
4 Press the Pause/Still button on the VCR
to pause recording when the source
tape reaches the beginning of the
sequence to be cut.
5 Press the Pause/Still (or Record) button
on the VCR to resume recording when
the source tape reaches the end of the
sequence to be cut.
To stop editing
Press d on the camcorder and press the Stop
button on the VCR.
Notes:
• Some of the transitions between edited
sequences may be slightly off.
• There may be picture noise during video search
or still playback. This does not imply a defect in
the camcorder.
• The time code display will be recorded along
with the edited sequences if the TC OUT item is
set to “ON”. Set to “OFF” before editing (see
page 46).
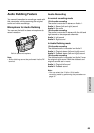
POWER
TV/VCR SET UP
CHANNEL
REC
PLAY
STOP/
EJECT
PAUSE
/STILL
To S-video input socket
Yellow: To video input jack
White: To audio input (L) jack
Red: To audio input (R) jack
Audio/video cable (supplied)
S-video cable (commercially available)
Playback
To S-VIDEO socket
Yellow: To VIDEO jack
White: To AUDIO L jack
Red: To AUDIO R jack