


Chapter 1 Overview
Chapter 1 Overview 19
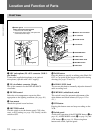
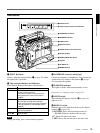
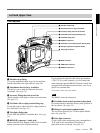
qa ALARM (alarm tone volume adjustment) knob
Controls the volume of the warning tone that is output
via the speaker (0 on page 18) or the EARPHONE
connector (3 on page 15). Turning this knob to the
minimum setting mutes the alarm tone.
qs MONITOR (monitor volume adjustment) knob
Controls the volume of the sound other than the
warning tone that is output via the speaker (0 on page
18) or the EARPHONE connector (3 on page 15).
Turning this knob to the minimum setting mutes the
audio output.
REC TIME SKIN DTL EXT VTR
OUTPUT
VTR
TRIGGER
AUDIO LEVEL
AUDIO SELECT
AUDIO IN
CH-1
LITHIUM BATT
MENU
TTL
DUR
ON
OFF
OFF
TTL RESET
HYPER
GAIN
PARALLEL
PRESET
DATE/TIME
F-RUN
REGEN
F-RUN
R-RUN
VJ MIC
WRR
SET
INT ONLY
EXT ONLY
FRONT
REAR
MIX
EXT
VBS
COMPONENT.
MONITOR SELECT
Y/C
SET
ClipLink
CONTINUE
ADVANCE SHIFT
CH-1
CH-2
ON
OFF
FRONT MIC
LOW CUT
ON
OFF
MONITOR OUT
CHARACTER
ON
OFF
AUTO
MAN
SETUP
FILE
STD
CH-2
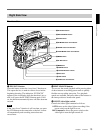
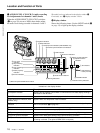
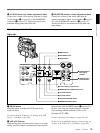
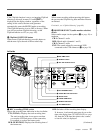
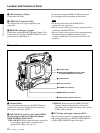
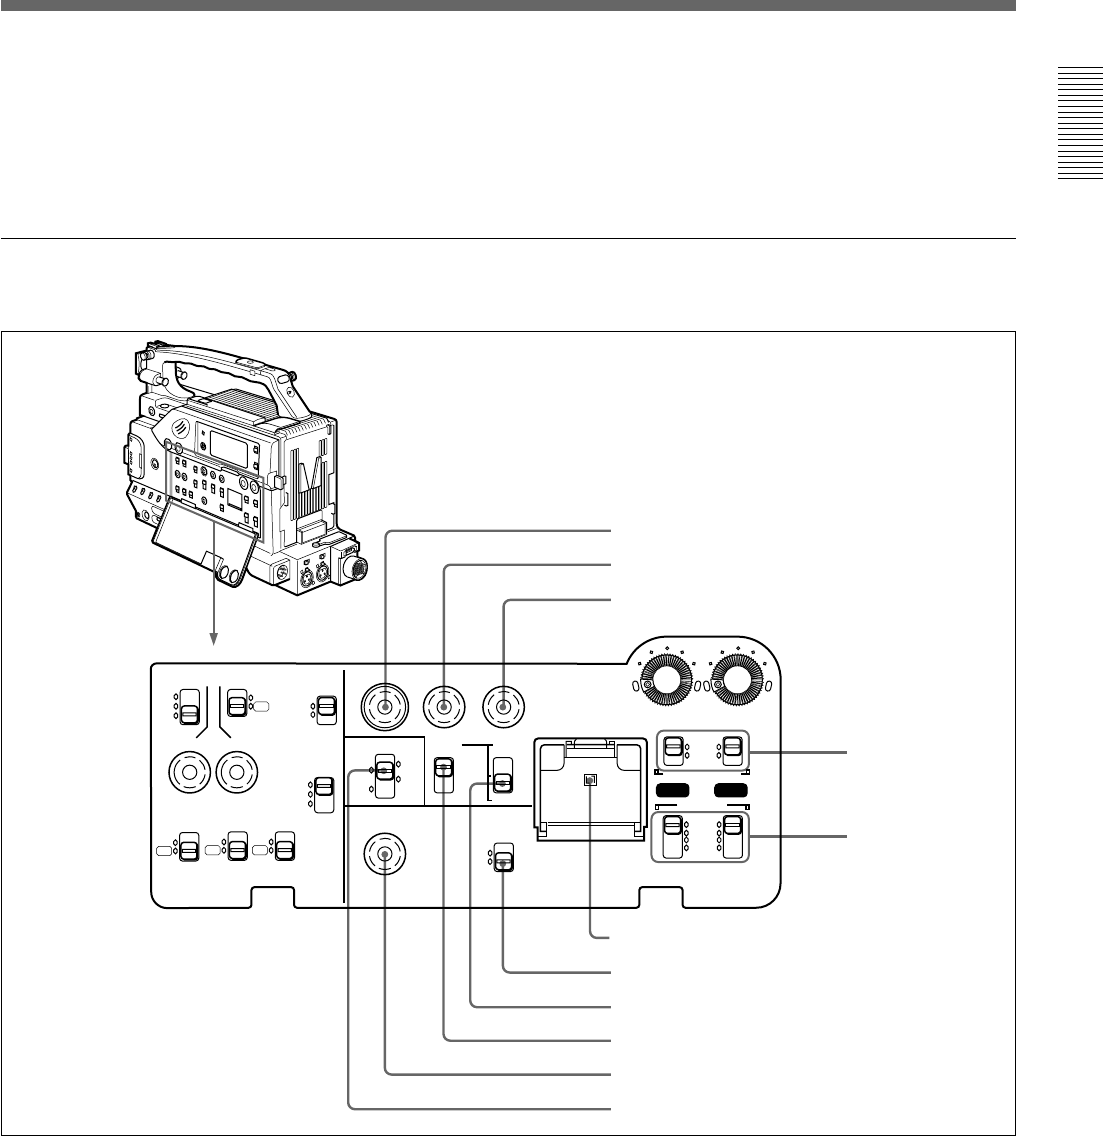
1 MENU button
2 ADVANCE button
3 SHIFT button
1 MENU button
Press this button to display the VCR menu in the
display window.
For details about the VCR menu, see “Setting on the VCR
Section —VCR Menu” (page 103).
2 ADVANCE button
When setting time code and user bit values, or at menu
setting, press this button to increment the digit that has
been selected with the SHIFT button (3 on page 20).
In other case, keep pressing this button to show the
clip remaining indication instead of time value.
(Example: CLIP 045)
For time code and user bit settings, see pages 62 to 65.
On how to use the ADVANCE button for menu settings, see
“Setting on the VCR Section —VCR Menu” (page 103).
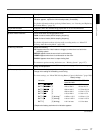
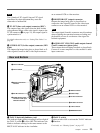
4 AUDIO SELECT
(CH-1/CH-2)
switches
5 AUDIO IN (CH-1/
CH-2) switches
6 Lithium battery compartment
7 MONITOR OUT CHARACTER switch
8 TC mode switch 2
9 TC mode switch 1
0 ClipLink CONTINUE button
qa MONITOR SELECT switch
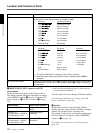
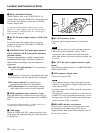
Operation panel under the cover
Right side