Setups
Assigning a Storage Location
29
Assigning a Camera to the Monitor
Window
Assign a camera to each monitor window of the selected
layout as follows.
1
Right-click on the monitor window to which you
want to assign a camera.
The pop-up menu appears.
2
Select Select Camera….
The Select Camera dialog appears.
3
Select the camera you want to monitor, then click
OK.
The image of the selected camera is displayed in the
monitor window.
To assign two or more cameras, repeat steps 1 to 3.
Note
If the camera is not connected to the network correctly,
the message “NO CONNECTION” appears and alarm
beeps sound.
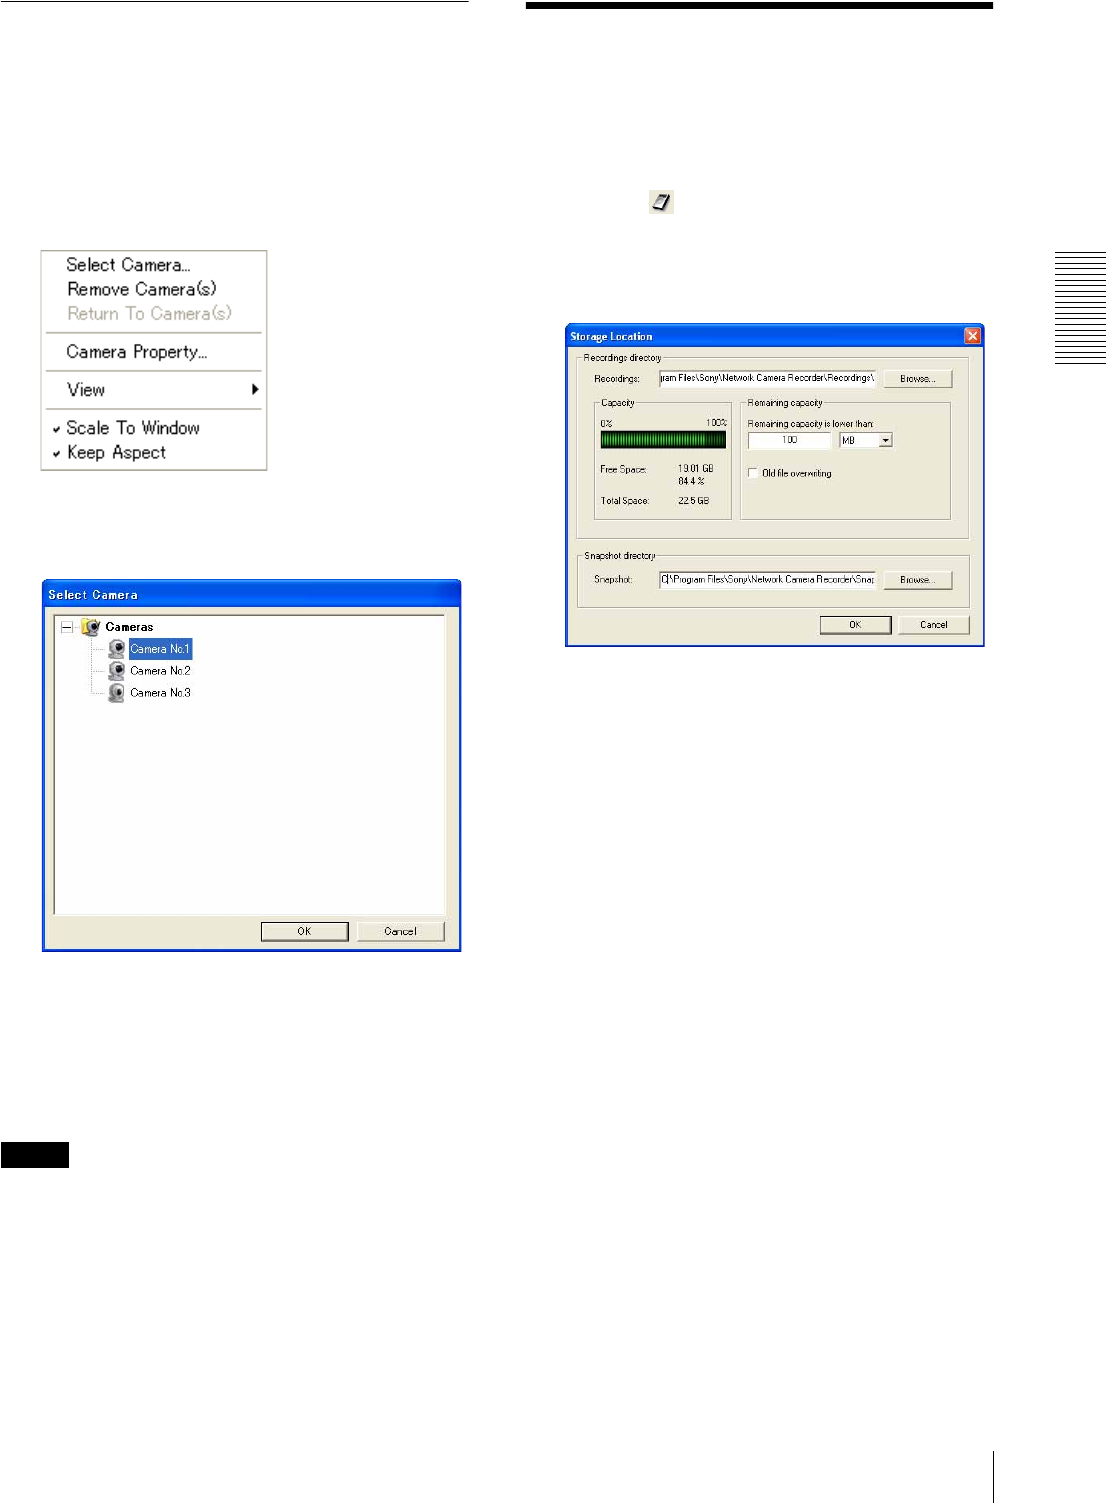
Assigning a Storage
Location
You can specify the storage location for recorded video
files and for snapshots.
1
Click the (Storage Locations) button on the
main toolbar.
The Storage Location dialog appears.
2
Set the parameters in the Storage Location dialog.
Recordings: Enter the full path of the storage
location. Click the Browse … button to
browse and select the folder.
Capacity: Displays information of the drive
specified in the path.
Remaining capacity: Set the capacity remaining
to trigger the recording cleanup task in either
% or MB.
If the remaining capacity is lower than the set
value, the following error message appears:
“Storage Location Manager Cannot record :
Free disk space is only aaa - 50 (work area) =
bbb MB (ccc %)?
aaa: Current remaining capacity
bbb: Capacity required for recording
ccc: The proportion that bbb occupies in the
drive
The error message appears when the size
“bbb” is lower than the value set on
Remaining capacity.
To perform recording, delete unnecessary
data.


