


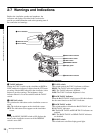


36
Recording
Chapter 3 Recording and Playback
Continuous recording in other cases
After rewinding or fast forward, after removing the
cassette, or on a tape that has been partially recorded, you
can obtain a continuous recording by following the
procedure below.
The End Search function also allows you to continue
recording on the partially recorded tape.
For details, see “3-2-7 Searching for the Last Recorded
Portion and Turning in Recording Pause Mode (End
Search Function)” on page 49.
Continuous recording after rewinding or fast forward,
after removing the cassette,
or on a tape that has been partly recorded
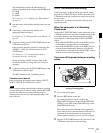
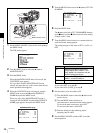
1
Looking in the viewfinder, press the PLAY button to
start playback.
2
Press the STOP button at the desired point to begin
recording. To continue from the end of recording
already on the tape, press the STOP button
immediately after the end of the previous recording
(within 0.5 seconds).
3
Press the RET button.
The tape will rewind and will be positioned at the
desired point to continue recording.
4
Press the VTR START button on the camcorder or the
VTR button on the lens to start recording.
3-2-3 Recording Essence Marks
Various essence marks, such as shot marks, can be
recorded on tape. Recording essence marks for scenes
containing important images and sounds enables quick
access to the marked points. This increases editing
efficiency.
There are essence marks that are automatically recorded by
starting recording or firing the flash and those you can
manually record when necessary.
For good shot marks (shot mark 1 and shot mark 2) and
recording start mark among available essence marks, you
can select recording in the LTC-UBIT area and/or
recording in the system area as required to maintain
compatibility with conventional systems.
Settings for recording essence marks to
the system area
Settings on the ESSENCE MARK and ESSENCE
MARK2 pages of the MAINTENANCE menu determine
which essence marks are to be recorded on the system area
of tape.
Follow the procedures below:
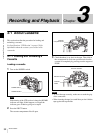
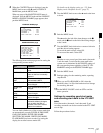
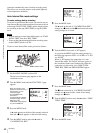
1
Set the MENU ON/OFF switch to ON while pushing
the MENU knob.
The TOP menu appears.
2
Turn the MENU knob to move the b mark to
MAINTENANCE.
3
Push the MENU knob.
When the MAINTENANCE menu is first used, the
CONTENTS page appears.
Or if you have used the MAINTENANCE menu
already, the page that was on the screen when the last
menu operation ended appears.
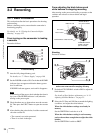
4
3
1,2
Note
MENU knob
MENU ON/OFF switch
Cover