


Recording
32
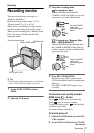
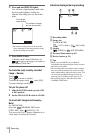
4 Press and hold PHOTO lightly.
You will hear a light beeping sound when
the focus and brightness settings are
adjusted. Recording does not start at this
point.
*The number of images that can be recorded
varies depending on the image quality setting
and the recording environment.
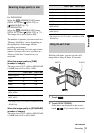
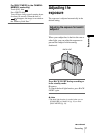
5 Press PHOTO fully.
A shutter sound is heard. When bars of
disappear, the image is recorded on
the “Memory Stick Duo.”
To check the most recently recorded
image – Review
Touch .
Touch to return to standby.
To delete the image, touch , then [YES].
To cancel deleting, touch [NO].
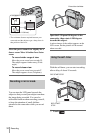
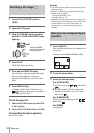
To turn the power off
1
Slide the POWER switch up to the OFF
(CHG) position.
2 Set the LENS COVER switch to CLOSE.
To record still images continuously –
Burst
For DCR-HC40E:
Select the (MEMORY SET) menu,
[STILL SET], then [ BURST] (p. 70).
You can record 3 to 13 images continuously in
a time interval of about 0.5 seconds.
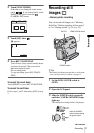
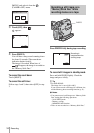
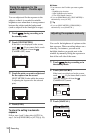
Indicators displayed during recording
A Recording folder
B Image size
For DCR-HC40E:
(1152 × 864) or (640 × 480)
C Quality
([FINE]) or ([STANDARD])
D Personal Menu button (p. 62)
E Review button (p. 32)
z Tips
• When you press PHOTO on your Remote
Commander, the image displayed on the screen at
that timing is recorded.
• The recording time, date, and the camera settings
data are recorded automatically on the recording
media without being displayed on the screen. You
can view this information during playback by
selecting [DATA CODE] on the screen (p. 57).
• The recording angle is wider than that of the
CAMERA-TAPE mode.
30
P-MENU
60min
FINE
1152
101
The indicator
stops flashing.
The number of images
that can be recorded.*
P-MENU
60min
FINE
1152
101