


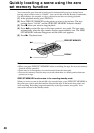
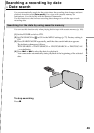
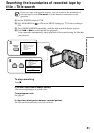


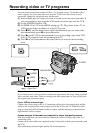

56
By simply selecting the scenes to edit, you can duplicate the desired portion on a tape,
using other equipment connected with an i.LINK cable (DV connecting cable). The
scenes can be selected by frame. Since your camcorder exchanges digital signals, you
can edit with little audio and video deterioration.
You cannot duplicate titles, display indicators, or the contents of cassette memory.
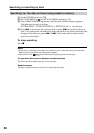
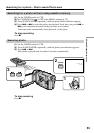
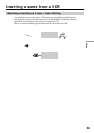
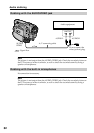
The connection is the same as on page 55.
(1) Insert a recorded tape into your camcorder and insert a blank tape (or a tape
you want to record over) into the DV product.
(2) Set the POWER switch of your camcorder to VTR.
(3) Set the input selector to DV input on the DV product. If the DV product is
another DV camcorder, set its POWER switch to VTR.
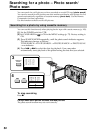
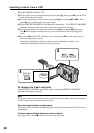
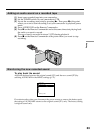
(4) Press MENU to display the menu.
(5) Turn the SEL/PUSH EXEC dial to select
, then press the dial.
(6) Turn the SEL/PUSH EXEC dial to select DV EDITING, then press the dial.
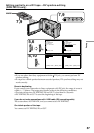
(7) Using the video control buttons, locate the point where you want to start
editing, then press X to set your camcorder in the playback pause mode
(p. 130).
(8) Press the SEL/PUSH EXEC dial or MARK on the Remote Commander to set
DV EDITING IN.
(9) Using the video control buttons, locate the point where you want to end
editing, then press X to set your camcorder in the playback pause mode.
(
10
)Press the SEL/PUSH EXEC dial or MARK on the Remote Commander to set
DV EDITING OUT. The editing process starts. When the process ends, your
camcorder and the DV product automatically set to pause mode.
Editing partially on a DV tape
– DV synchro-editing (DCR-TRV10 only)