


74
Touch [ ].
ashes quickly. When the white
balance has been adjusted and stored
in the memory, the indicator stops
ashing.
Notes
Set [WHITE BAL.] to [AUTO] or adjust the
color in [ONE PUSH] under white or cool
white uorescent lamps.
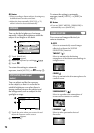
When you select [ONE PUSH], keep framing
white object while
is ashing quickly.
ashes slowly if [ONE PUSH] could not be
set.
When [ONE PUSH] was selected, if keeps
ashing aer touching
, set [WHITE BAL.]
to [AUTO].
When you set [WHITE BAL.], [SCENE
SELECTION] is automatically set to [AUTO].
Tips
If you changed the battery pack, or moved your
camcorder to or from outdoors when [AUTO]
was selected, aim your camcorder at a nearby
white object with [AUTO] for about 10 seconds
for better color balance adjustment.
If you change the [SCENE SELECTION]
settings or move your camcorder outdoors
during white balance setting with [ONE PUSH],
you need to repeat the [ONE PUSH] operation.
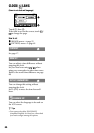
COLOR SLOW SHTR
(Color Slow Shutter)
When you set [COLOR SLOW SHTR] to
[ON], you can record an image brighter in
color even in dark places.
appears on the screen.
To cancel [COLOR SLOW SHTR], touch
[OFF].
Notes
Adjust the focus manually ([FOCUS], p. 71)
when it is hard to focus automatically.
e shutter speed of your camcorder changes
depending on the brightness, which may result
in a slowdown of the motion of the image.
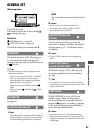
S. NIGHTSHOT PLS (Super
NightShot plus)
e image will be recorded at a maximum
of 16 times the sensitivity of NightShot plus
recording if you set [S. NIGHTSHOT PLS]
to [ON] while the NIGHTSHOT PLUS
switch (p. 28) is also set to ON.
appears on the screen.
To return to the normal setting, set [S.
NIGHTSHOT PLS] to [OFF].
Notes
Do not use [S. NIGHTSHOT PLS] in bright
places. is may cause a malfunction.
Do not cover the infrared port with your ngers
or other objects.
Remove the conversion lens (optional).
Adjust the focus manually ([FOCUS], p. 71)
when it is hard to focus automatically.
e shutter speed of your camcorder changes
depending on the brightness, which may result
in a slowdown of the motion of the image.
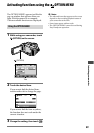
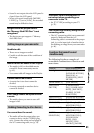
FADER
You can record a transition with the
following eects adding to the interval
between scenes.
Select the desired eect in [STBY] (to fade in)
or [REC] (to fade out) mode, then touch
.
Press START/STOP.
e fader indicator stops ashing and
disappears when the fade is complete.
To cancel the fader before starting the
operation, touch [OFF] in step .
If you press START/STOP, the setting is
canceled.
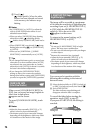
WHITE FADER
Fading out Fading in