


14
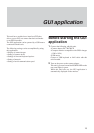
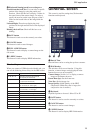
GUI application
Basic operation
To operate the GUI application, connect and use a
USB mouse (use left clicks only).
When you connect a USB keyboard with this unit,
shortcut keys can be used.
Regarding specific shortcut keys for each screen, refer
to the HELP information by clicking on the
on
upper right of the screen.
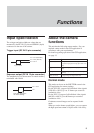
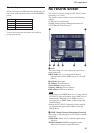
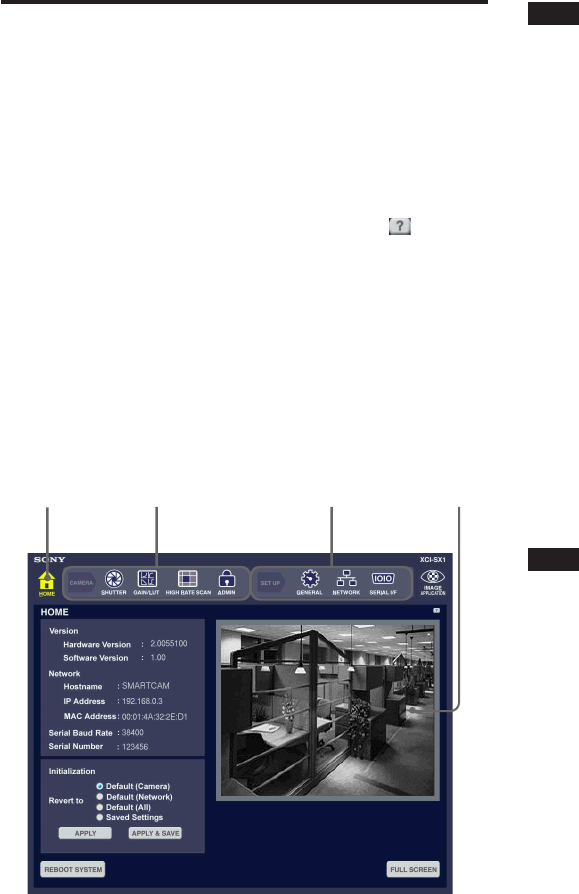
To move to a desired screen
Select an icon on the tool bar located at the top of the
screen.
When you connect a USB keyboard, you can move to
a desired screen by pressing the underlined letter of an
icon and the Ctrl key in the keyboard simultaneously.
The current selected screen is one with the icon in
yellow on the tool bar.
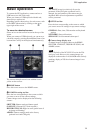
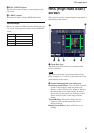
1 HOME button
Press this icon to move to the HOME screen.
2 CAMERA setting tool bar
Press the icon corresponding to the screen to which
you want to move for the camera settings.
Camera images can be displayed on the following
screens:
SHUTTER: Shutter mode and shutter speed
GAIN/LUT: Gain and LUT (look up table)
HIGH RATE SCAN: High rate scan (partial scan of
an image and binning)
ADMIN: Camera settings made at the factory
(pedestal level and CDS gain)
1
2
3
4
Note
The ADMIN screen is exclusively for service
personnel. If the CDS gain or pedestal level is
changed, the performance of the camera may be
degraded. Refer all such adjustments to qualified
service personnel.
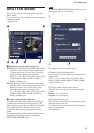
3 SETUP tool bar
Press the icon corresponding to the screen to which
you want to move for settings except camera settings.
GENERAL: Date, time, Web monitor and keyboard
settings
NETWORK: Network functions
SERIAL I/F: Serial communication speed
4 Camera image display area
A camera image is displayed here on the HOME,
SHUTTER, GAIN/LUT, HIGH RATE SCAN, and
ADMIN screens.
Note
The CCD pixels of the XCI-SX1/V3 are in the 256-
level gray scale. However, the camera images are
displayed on the monitor in 16-bit RGB mode. Strictly
speaking, display of 256-level camera images is not
possible.