-17-
images. The default directory will be “My Documents”
All selected images will be saved sequentially beginning
with the name Photo001. You may specify a different prefix by typing the desired name in the
“File name” space.
Click on the “
Save
” button to save the selected images.
Note:
After your images are downloaded to your PC, disconnect the camera. Your images remain
in camera memory. Delete the images from camera memory so you can capture more.
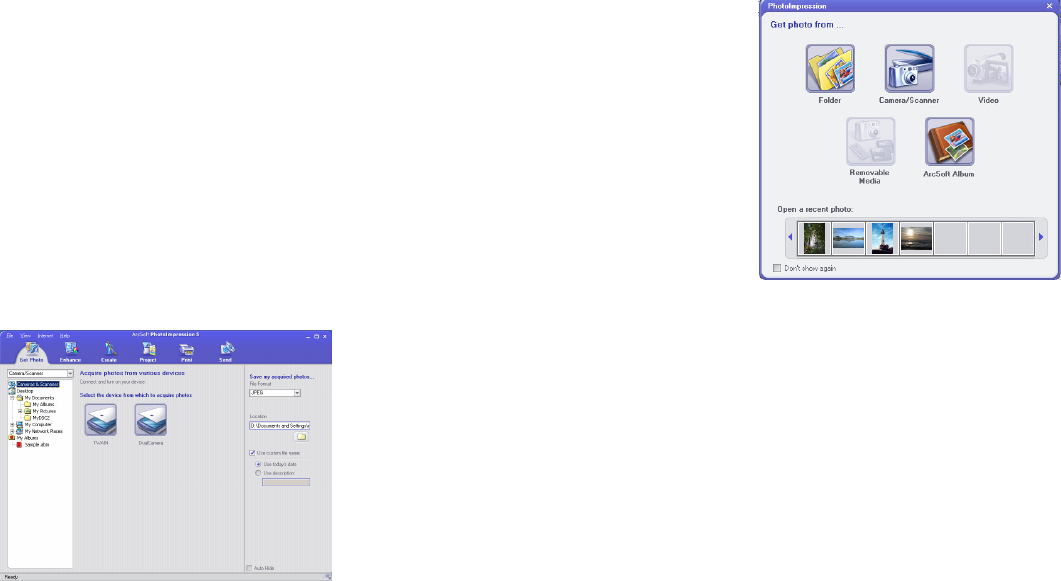
5.2 Transferring your Images to PhotoImpression 5
To transfer images to PhotoImpression following these steps:
Connect your camera.
Launch PhotoImpression.
In the “ Get photo from…. ” dialog box (shown to the right)
choose the source of your images.
Click on “ Camera/Scanner.”
A new window as below will appear.
Double click on “
MyDsc2
”, or “
DualCamera
.”
The VQ 350 (
MyDsc2
) GUI control panel appears on the
screen.
Follow the steps in the prior section.
Note that a fourth button appears in the VQ 350 GUI –
“
Transfer to AP
”. Instead of immediately saving your
images to disk you may first transfer them to
PhotoImpression to edit them prior to saving them.


