


AXIS 230 Installing the AXIS 230
11
Installing the AXIS 230
This section is intended for use by the product administrator. Operators and viewers should
read Operating the AXIS 230, on page 15.
Installation using AXIS IP Utility
Important!
AXIS IP Utility is a software application that quickly and simply installs an Axis device
onto your local network. Download the latest version, free of charge, from www.axis.com
1. Connect an Ethernet cable to the AXIS 230 and attach it to the network.
2. Connect power to the camera.
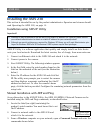
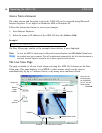
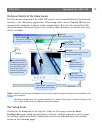
3. Start AXIS IP Utility. The following window appears:
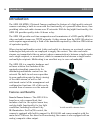
4. In the first field, enter the serial number found on the
label on the underside of the unit (see the illustration
below.)
5. Enter the IP address for the AXIS 230 and click Set
IP. The utility now prompts you to restart the camera
and then displays a message confirming that the IP
address has been set. To view the camera’s home
page, click the button provided. Configure the remaining network parameters from the
setup tools.
Manual Installation with ARP and Ping
As an alternative to the AXIS IP Utility, the AXIS 230 MPEG-2 Network Camera can be
installed using the ARP and Ping commands, as described below.
1. Locate the label (see right) containing the
product’s serial number. You must know this to set
the IP address.
2. Connect a network cable to the AXIS 230 and
attach it to the network.
3. From a Windows computer on your network, open a Command Prompt and enter the
commands shown below.
• Although it may be possible to use the AXIS 230’s default IP address 192.168.0.90, please consult
your network administrator to obtain a suitable IP address for your network/subnet.
• Although no special privileges are required for Windows XP Home, you will need Administrator priv-
ileges for Windows 2000 and XP Professional. UNIX systems require Root privileges.
Serial number equals
MAC/Ethernet address