71
Recording
White Balance
The camcorder uses an electronic white balance process to calibrate the picture for accurate color
display under different lighting conditions. In addition to the fully automated mode, white balance
modes include an indoor mode, an outdoor mode, a color temperature setting and two user-defined
custom preset values.
Selecting the White Balance Setting
1. Set the POWER dial to a recording program
other than .
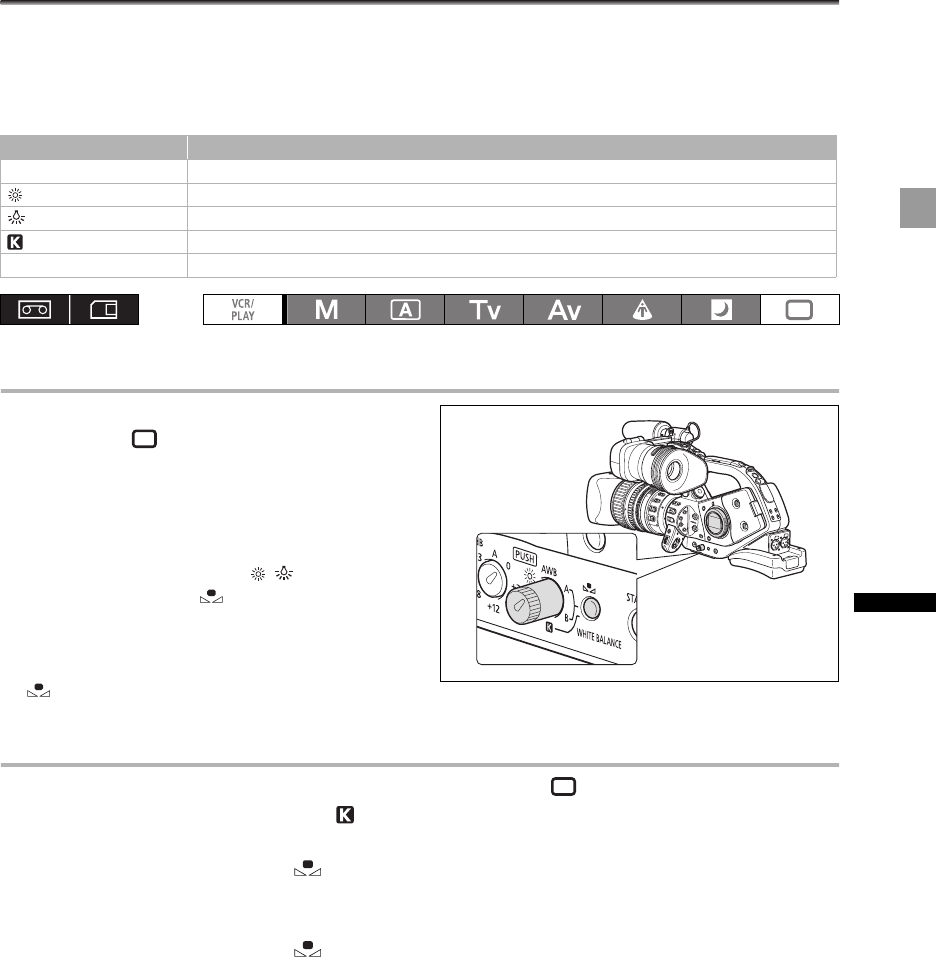
2. Push the WHITE BALANCE dial so that it
pops out.
3. Set the WHITE BALANCE dial to the
desired white balance setting.
You can fine-tune the preset / settings. Press
the WHITE BALANCE button so the preset icon
and the neutral value ±0 start flashing. Adjust the
white balance with the SELECT dial to a value
between -9 and +9 and press the WHITE BALANCE
button again.
Setting the Color Temperature
1. Set the POWER dial to a recording program other than .
2. Set the WHITE BALANCE dial to .
The color temperature currently set will be displayed.
3. Press the WHITE BALANCE button.
The color temperature display will start flashing.
4. Turn the SELECT dial to set the desired color temperature.
5. Press the WHITE BALANCE button again.
The color temperature display stops flashing and stays on.
WHITE BALANCE dial Use
AWB Automatic adjustment of white balance.
(outdoor) Bright sunlight (5,600 K).
(indoor) Incandescent light (3,200 K).
(color temperature) Setting depending on the hue of a specific lighting (2,000 - 15,000 K in 100 K increments).
Custom Preset A, B Custom preset (3,200 - 5,600 K).


