


91
Before Use
Basic Guide
Advanced Guide
Camera Basics
Auto Mode
Other Shooting
Modes
P Mode
Playback Mode
Setting Menu
Accessories
Appendix
Index
Before Use
Basic Guide
Advanced Guide
Camera Basics
Auto Mode
Other Shooting
Modes
P Mode
Playback Mode
Setting Menu
Accessories
Appendix
Index
•Cropping may not be possible at small image sizes, or at some
aspect ratios.
•Dates may not be printed correctly if you crop images shot with
[Date Stamp ] selected.
Still Images
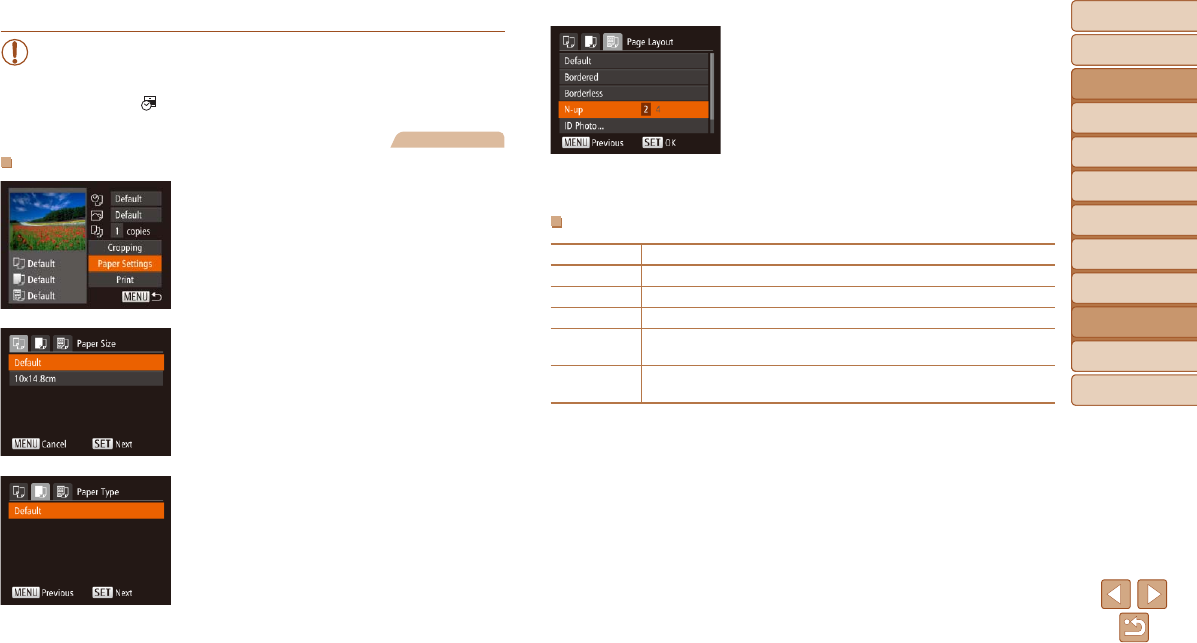
Choosing Paper Size and Layout before Printing
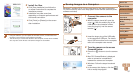
1 Choose [Paper Settings].
After following step 1 in “Conguring Print
Settings” (=
90) to access the printing
screen, choose [Paper Settings] and
press the <m> button.
2 Choose a paper size.
Press the <o><p> buttons to choose an
option, and then press the <m> button.
3 Choose a type of paper.
Press the <o><p> buttons to choose an
option, and then press the <m> button.
4 Choose a layout.
Press the <o><p> buttons to choose
an option.
When choosing [N-up], press the
<q><r> buttons to specify the number of
images per sheet.
Press the <m> button.
5 Print the image.
Available Layout Options
Default Matches current printer settings.
Bordered Prints with blank space around the image.
Borderless Borderless, edge-to-edge printing.
N-up Choose how many images to print per sheet.
ID Photo
Prints images for identication purposes.
Only available for images with a resolution of L.
Fixed Size
Choose the print size.
Choose from 3.5 x 5 in., postcard, or wide-format prints.