


A
djusting the Picture: Exposure, Focus and Color
52
* When you select [ SET], do not press
and continue instead with the
procedure below.
T
O SET THE CUSTOM WHITE BALANCE
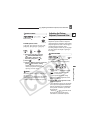
1 Point the camcorder at a white
object, zoom in until it fills the
whole screen and press ( ).
Keep the camcorder zoomed at the
white object until stops flashing.
2 Press to save the setting and
close the menu.
NOTES
Depending on the type of fluorescent light,
optimal color balance may not be obtained with
[ FLUORESCENT] or [ FLUORESCENT
H]. If the color looks unnatural, adjust it using
[ AUTO] or [ SET].
When you have set the custom white balance:
- Depending on the light source, may keep
flashing. The result will still be better than with
[AUTO].
- Reset the white balance when the lighting
condition changes.
- Turn off the digital zoom.
The camcorder retains the custom white
balance setting even if you turn it off.
Custom white balance may provide better
results in the following cases:
- Changing lighting conditions
- Close-ups
- Subjects in a single color (sky, sea or forest)
- Under mercury lamps and certain types of
fluorescent lights
Image Effects
You can record with different color
saturation and contrast effects.
POINTS TO CHECK
Mode switch:
Options
Default value
[ FLUORESCENT]
For recording under warm white, cool
white or warm white type (3-wavelength)
fluorescent lighting.
[ FLUORESCENT H]
For recording under daylight or daylight
type (3-wavelength) fluorescent lighting.
[SET]
Use the custom white balance setting to
make white subjects appear white under
colored lighting.
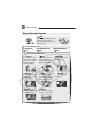
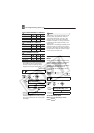
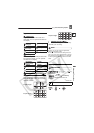
FUNC.
( 27)
Icon of the currently selected
White Balance
Desired option*
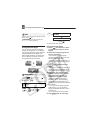
FUNC.
FUNC.
FUNC.
FUNC.
( 13)
[ IMAGE EFFECT OFF]
Records with no image enhancing effects.
[ VIVID]
Emphasizes the contrast and color
saturation.
[ NEUTRAL]
Tones down the contrast and color
saturation.
[ LOW SHARPENING]
Records subjects with softened outlines.
[ SOFT SKIN DETAIL]
Softens the details in the skin tone area for
a more complimentary appearance. To
obtain the best effect, use this setting
when recording a person in close-up. Note
that areas similar to the skin color may lack
in detail.