SHORT COURSES (HTTP://WWW.SHORTCOURSES.COM)
21
USING SLOW SYNC FLASH
1. Set the camera to Night Scene mode.
2. Take the photo.
USING FLASH EXPOSURE LOCK
1. With the camera on and in shooting mode, set the Mode
Dial to any mode in the Creative Zone.
2. With the monitor on, center the subject you want to lock
flash exposure on or put it in the active AF frame.
3. Press the * (asterisk) button on the back of the camera. The
flash will fire a preflash and the flash exposure compensa-
tion setting will lock. The asterisk icon will be displayed on
the monitor and display panel. (To cancel the locked flash
exposure, press any button other than the shutter button or
Omni Selector.)
4. Compose the image the way you want it and press the
shutter button halfway down to reset focus. The indicator
next to the viewfinder will glow orange.
5. Press the shutter button all the way down to take the
picture. Flash exposure is automatically unlocked when
you take the picture.
USING FLASH EXPOSURE COMPENSATION
1. With the camera on and in shooting mode, set the Mode
Dial to any mode other than Auto, Manual (M), or Movie.
2. Press the Exposure Compensation (+/-) button to display
the flash exposure compensation bar on the display panel
and monitor.
3. Do one of the following:
■ To darken the subject illuminated by the flash, press the
left point on the Omni Selector to decrease exposure.
■ To lighten the subject, press the right point to increase
exposure.
4. Press the shutter button to take the picture and have the bar
reappear so you can make adjustments. (To hide the bar,
press SET.)
5. When finished, repeat Steps 1–4 to reset flash exposure
compensation to 0.
© COPYRIGHT 2001 BY DENNIS P. CURTIN
22
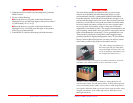
USING AN EXTERNAL FLASH
1. Attach the flash to the camera’s hot shoe and set the Main
dial to shooting mode (the red camera icon).
2. With the camera on and in shooting mode, set the Mode
Dial to any mode other than Stitch Assist, Movie, or con-
tinuous.
3. Turn the flash on and press the shutter button halfway
down to focus. The flash will fire if its pilot light is on. The
flash icon will be displayed on the camera’s monitor.
4. Press the shutter button all the way down to take the
picture.
TAKING MACRO CLOSE-UPS
1. With the camera on, set the Mode Dial to any mode other
than Pan Focus, Landscape, or Night Scene.
2. Press the Macro button (a flower blossom icon) until the
same icon is shown on the display panel.
3. Use the monitor to compose the image by zooming in or
out or moving the camera in or out.
4. Press the shutter button halfway down. When the camera is
ready to take the picture, it beeps and the lower indicator
next to the viewfinder glows yellow. Press the shutter
button all the way down to take the picture.
5. When done, press the Macro button to turn off macro mode
(no flower blossom icon) or just turn off the camera to
cancel the mode.
INCREASING DEPTH OF FIELD IN CLOSE-UPS
■ Increase the illumination of the subject to stop down the
aperture.
■ Don’t get any closer to the subject than you have to.
■ Focus on something in the middle of the scene (front to back)
since in close-ups, depth of field is half in front and half behind
the plane of critical focus.
SHOOTING PANORAMIC SEQUENCES
1. With the camera on and in shooting mode, set the Mode


