SHORT COURSES (HTTP://WWW.SHORTCOURSES.COM)
11
CHANGING EXPOSURE MODES
■■
■■
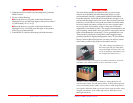
■ With the camera on and in shooting mode (the red camera
icon), turn the Mode Dial so one of the modes aligns with the
index mark on the camera body.
USING IMAGE ZONE MODES
1. With the camera on, set the Main Dial to shooting mode
(the red camera icon).
2. Turn the Mode Dial to one of the modes in the Image Zone
so its icon aligns with the small index mark on the camera
body.
USING PROGRAM AE
1. With the camera on , set the Main Dial to record mode (the
red camera icon).
2. Turn the Mode Dial to P (for Program AE).
SELECTING A SHUTTER SPEED
1. With the camera on and in shooting mode, set the Mode
Dial to Tv (shutter-priority).
2. Press the left point on the Omni Selector to select a slower
shutter speed or the right one to select a faster shutter
speed. Hold the points down to scroll quickly through the
available settings.
SELECTING AN APERTURE
1. With the camera on and in shooting mode, set the Mode
Dial to Av (aperture-priority).
2. Press the left point on the Omni Selector to select a larger
aperture or the right one to select a smaller aperture. Hold
the points down to scroll quickly through the available
settings.
USING MANUAL MODE
1. With the camera on and in shooting mode, set the Mode
Dial to M (manual).
2. As you watch the display panel or monitor, press the left or
right arrow on the Omni Selector to select a shutter speed
© COPYRIGHT 2001 BY DENNIS P. CURTIN
12
and the up or down arrow to select an aperture. Hold the
points down to scroll quickly through the available settings.
SWITCHING BETWEEN SPOT AND NON-SPOT METERING
1. With the camera on, set the Mode Dial to any Creative
Zone mode.
2. Press the Spot Metering button once to display the spot
metering icon (a rectangle with a dot in it) on the display
panel or monitor, and again to remove it. When the icon
isn’t shown on the display panel, the camera is in evalua-
tive or center-weighted mode. To specify which, see below.
CHOOSING EVALUATIVE OR CENTER-WEIGHTED METERING
1. With the camera on and in any Creative Zone mode, press
MENU.
2. Press the down point on the Omni Selector to highlight
Light Metering and press the left or right point to select
evaluative (the default) indicated by a rectangular icon with
a circled dot in it, or center-weighted indicated by an empty
rectangle.
3. Press MENU to confirm the setting and hide the menu.
USING EXPOSURE COMPENSATION
1. With the camera on, set the Mode Dial to any mode other
than Auto or M (manual).
2. Press the Exposure Compensation (+/-) button to display
the exposure compensation bar on the display panel and
monitor.
3. Do one of the following:
■ To darken an image, press the left point on the Omni
Selector to decrease exposure.
■ To lighten an image, press the right point to increase
exposure.
4. When you have the scene on the monitor looking the way
you want it, press the shutter button to take the picture and
have the bar reappear so you can make adjustments. (To
hide the bar, press SET.)
5. When finished, reset exposure compensation to 0.


