SHORT COURSES (HTTP://WWW.SHORTCOURSES.COM)
5
Using Manual Focus ....................................................................... 8
Linking Spot Metering to the AF Frame .......................................... 9
Using Focus Lock for Maximum Depth of Field .............................. 9
Increasing Depth of Field ................................................................ 9
Using Focus Lock for Minimum Depth of Field ............................... 9
Decreasing Depth of Field .............................................................. 9
Capturing Creative Blur .................................................................. 9
Adjusting White Balance ................................................................. 9
Zooming the Lens ......................................................................... 10
Turning Digital Zoom On and Off .................................................. 10
Using Digital Zoom ....................................................................... 10
Using Auto Flash .......................................................................... 10
Combating redeye ........................................................................ 10
Using Fill Flash ............................................................................. 10
Turning the Flash Off and On ....................................................... 10
Using Slow Sync Flash ................................................................. 11
Using Flash Exposure Lock .......................................................... 11
Using Flash Exposure Compensation........................................... 11
Using an External Flash................................................................ 11
Taking Macro Close-ups............................................................... 11
Increasing depth of Field in Close-ups.......................................... 11
Shooting Panoramic Sequences................................................... 11
Using Color Effects ....................................................................... 12
Using Continuous Mode ............................................................... 12
Choosing a Continuous Mode ...................................................... 12
Capturing Movies.......................................................................... 12
PLAYING BACK MOVIES
12
Preparing Print Sets ..................................................................... 12
Adjusting Contrast, Sharpness, and Saturation ............................ 13
Using The Set up Menu ................................................................ 13
Managing Image Files .................................................................. 14
GreenBatteries ............................................................................. 14
d-store .......................................................................................... 15
© COPYRIGHT 2001 BY DENNIS P. CURTIN
6
TAKING PICTURES IN AUTO MODE
1. Remove the lens cap, set the Main Dial to shooting mode
(the red camera icon), then set the Mode Dial to the green
AUTO.
2. Compose the image in the viewfinder making sure the area
that you want sharpest is in the autofocus crosshairs. You
can use the zoom lever to change the angle of view.
3. Press the shutter button halfway down so the camera can
set the focus, exposure, and white balance. The indicators
next to the viewfinder will glow or blink as described in the
box to the left.
4. Press the shutter button all the way down to take the
picture.
■ The shutter sounds and the indicator next to the view-
finder flashes green until the image is fully stored. You can
take another photo immediately if there is room for it in the
camera’s memory.
■ If the monitor is open and on, the image is displayed for
2 seconds so you can review it.
5. When done shooting, turn the Main Dial to OFF and
replace the lens cap.
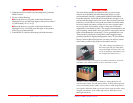
USING DIALS AND BUTTONS
■ Main Dial circling the Mode Dial on top of the camera,
switches the camera among Shooting, OFF, and Replay
modes.
■ Mode Dial selects various shooting modes including Auto
(page 8), and those from the Image and Creative Zones (page
24).
■ Shutter button locks in exposure and focus when pressed
halfway down, and takes the picture when pressed all the
way.
■ Zoom lever circling the shutter button zooms the lens in
shooting mode (page 76) and zooms images in replay mode
(page 14.)
■ Continuous/Self-timer sets the camera to shoot sequences
of photos one after another (page 103), and turns on the self-
timer (page 49).


