


131
Playback via Browser
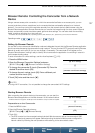
Menus
Table of Contents Index
Playback via Browser
You can use the Playback via Browser function to access the photos in the camcorder from the Web browser of
a connected network device*. You can then play back your photos using the Web browser and even save local
copies of them on the device.
* For details about compatible devices, operating systems, Web browsers, etc., please visit your local Canon Web site.
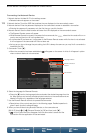
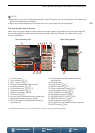
1 Camcorder: Open the [}] index screen (A 103).
2 Camcorder: Press the MENU button.
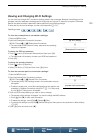
3 Camcorder: Open the [Playback via Browser] screen.
[— Wi-Fi Setup] > [1] > [Playback via Browser]
• The camcorder’s SSID (network name) and password will appear.
The camcorder is ready to connect with the network device.
4 Network device: Activate Wi-Fi in the settings screen.
• Detected networks appear on the screen.
5 Network device: Touch the SSID that matches the one displayed
on the camcorder’s screen.
6 Network device: Enter the password displayed on the camcorder’s screen to establish a connection.
• Entering the password is necessary only the first time you use this function.
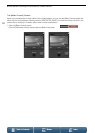
• The camcorder’s screen will change and show a URL.
7 Network device: Start the Web browser and enter the URL displayed on the camcorder’s screen.
• The Playback via Browser screen will appear.
• The URL is always the same so you may find it convenient to bookmark the URL.
8 Network device: Play back your photos.
• Touch the desired photo from the list of photos. The selected photo will be displayed.
• Touch/click ö to return to the list of recordings.
• Devices other than iOS devices: Touch/click õ to save a local copy of the photo on the device.
9 Camcorder: When you have finished playing back, touch [End] and then touch [OK] to end the
wireless connection.
NOTES
• Only one device may be connected to the camcorder at a time.
Operating modes:
[— Wi-Fi Setup]
[1]
[Playback via Browser]