


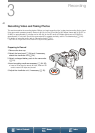


Recording Video and Taking Photos
42
Menus
Table of Contents Index
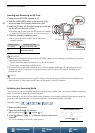
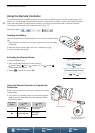
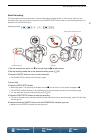
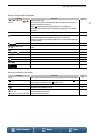
To take photos
4 Press the PHOTO button halfway.
• When the FOCUS switch is set to A (autofocus): If the subject is not in focus, g will flash in yellow. Once
the focus is automatically adjusted, g will turn green and one or more AF (autofocus) frames will appear.
You can also change the autofocus method (A 69).
5 Press the PHOTO button fully.
• The ACCESS indicator flashes in red intermittently as the camcorder records to the recording media.
6 Press and hold the ON/OFF button until the POWER/CHG indicator goes out.
• Make sure the ACCESS indicator has also gone out.
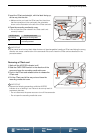
IMPORTANT
• Observe the following precautions while the ACCESS indicator is on or flashing in red. Failure to do so may
result in permanent data loss.
- Do not open the recording media slot cover and do not remove the recording media.
- Do not disconnect the power source or turn off the camcorder.
• Be sure to save your recordings regularly (A 116, 118), especially after making important recordings. Canon
shall not be liable for any loss or corruption of data.
NOTES
• The built-in microphone may pick up operation noise from the camcorder while recording. Using a
commercially-available external microphone may reduce this noise.
• You can also press the transmit button on the supplied remote controller to record clips and take photos.
• You can select the length of time to review a photo after it is recorded (A 137).
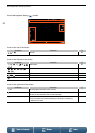
Taking Photos During Mode
If you set an assignable button to [ Photo] (A 100), you can take a photo while recording a clip or while
the camcorder is in record standby mode. When you press the button, {æ8 will appear on the upper right of
the screen.
The size of the photo depends on whether the resolution is set to 4K or HD. When the resolution is set to 4K, the
photo size will be 3840x2160; when set to HD, 1920x1080.
NOTES
• You can even capture a photo in mode while a clip is being played back (A 109).
• You cannot take a photo while recording a clip when an external device is connected to the HDMI OUT
terminal or when [Slow & Fast Motion] is set to [x1/4] or [x1/2].