


Communicating with the Camera
To configure the Observer camera, communication must first be established with a desktop PC.
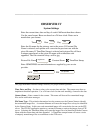
A pass thru serial cable is used to connect the 9-pin D connector on the camera to a similar
connector associated with a serial COM port on the computer.
Once communications is established, any web browser (Internet Explorer, Netscape) on the PC
can navigate the pages internal to the camera. These pages allow camera options to be selected
and configuration parameters entered. Once the camera is configured, it is disconnected from the
PC; the configuration will be maintained even with the power off. The configuration process
need not be repeated until a different type of operation is required. See the section, "Browsing
the Camera’s Web Pages", for detailed instructions on accessing and setting camera parameters.
Establishing communications with a PC
A serial communications link between a desktop PC and the Observer is required to configure
and test the camera. A software utility can be found on the accompanying CD that will setup this
link on the user’s computer. This utility will properly configure a desktop computer, using either
Windows XP or Windows 2000 operating system, to communicate with the Observer IV camera.
The use of this utility, “InstallObserver.exe”, is described in Appendix G. Users with Windows
98 SE operating systems will need to manually configure their computer to make the required
connection. Examples for accomplishing this are found in Appendix D of this document.
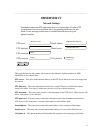
Once the appropriate communications driver and protocol have been installed in the desktop PC
the Observer can be connected. Connect a straight thru 9 pin serial cable to the 9 pin connector
on the back of the Observer and connect the other end to the COM port on the PC that you
selected while installing the modem driver. Make sure the camera is plugged into the correct
COM port.
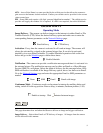
Place switch 1 on the back panel down (OFF) and switches 2 and 3 up (ON). Turn the Observer
Camera on by pushing the power switch on the back panel to the left. The red LED on the back
panel will come on and blink. Click on the “Observer on Com1” icon that was created when the
communications link was installed by the InstallObserver utility. A window will pop up showing
that the connection is being established; this may take a few seconds. The LEDs on the back of
the Observer Camera should progress from red to yellow to green once the connection is
successful. Now the camera can be configured via a desktop computer and Internet Explorer.
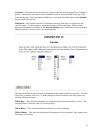
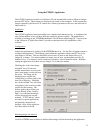
Configuring the camera using a web browser
Open a web browser on the computer. In the address bar at the top type "http://10.1.1.1." and
click on 'go'. The numbers 10.1.1.1 are the network address for the Observer camera. The
camera’s home page should appear. If there are other network connections on the PC there
maybe an initial delay of a few seconds before the camera’s page appears. The camera’s web
pages are best suited for viewing on an 800 x 600 resolution monitor. They can be viewed as
well on higher resolution settings, although it may be necessary to reduce the text sized displayed
by the browser. If the cameras pages have overlapping frames go to 'View - Text Size’ with the
IE tool bar and reduce the text size one step. The web pages presented by the Observer Camera
are described in the next section.
5