


EPSON Stylus COLOR 800
1/97
EPSON Stylus COLOR 800 - 17
Aligning the Print Heads
If your printouts contain misaligned vertical lines, you may
need to align the print heads. You can align the print heads
in either of the following two ways:
❏ With the Print Head Alignment utility in your printer
software (when the printer is on a local port rather than a
network)
❏ Using the printer’s control panel buttons
Using the Print Head Alignment Utility
Follow these steps to run the utility from a Windows
computer or a Macintosh:
1. Make sure the printer is turned on and paper is loaded.
Caution:
Load paper that’s at least 8.27 inches (210 mm) wide. This
prevents ink from spraying inside the printer and smudging
your printouts.
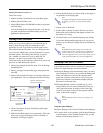
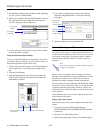
2. Access the Main printer settings dialog box.
3. Click the Utility tab (Windows) or the Utility button
(Macintosh). You see the Utility menu.
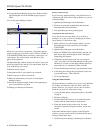
4. Click the Print Head Alignment icon.
5. Follow the instructions on the screen to print a test page
and select the correct alignment.
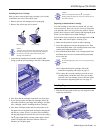
Using the Control Panel To Align the Print Heads
Follow these steps to align the print heads using the control
panel buttons:
1. Make sure the printer is turned off and paper is loaded.
2. Open the printer cover.
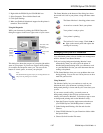
3. Hold down the
load/eject button and the black
cleaning button and turn on the printer. Then release the
buttons.
The printer prints an instruction sheet that tells you how to
align the print heads.
4. Follow the instructions on the printed sheet.
5. When you’re finished, turn off the printer to exit the
alignment mode.
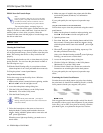
Cleaning the Printer
To keep your printer working at its best, you should clean it
several times a year, following these steps:
Caution:
Don’t touch the gears inside the printer.
Never use alcohol or thinner for cleaning; they can damage
the printer components and case.
Don’t use a hard or abrasive brush.
Don’t get water on the printer components.
Don’t spray lubricants or oils inside the printer.
1. Turn off the printer, unplug the power cord, and
disconnect the printer cable.
2. Remove all the paper from the sheet feeder.
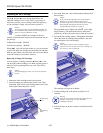
3. Carefully clean away dust and dirt with a soft brush.
4. Clean the exterior of the printer with a soft, damp cloth.
Keep the printer cover closed so water doesn’t get inside.
5. Clean ink out of the printer’s interior with a soft, damp
cloth.
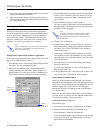
Using Optional Interfaces
Your EPSON Stylus COLOR 800 includes both parallel and
serial interfaces. You can connect it to a PC or Macintosh,
or both at the same time. If you want to connect to another
system or to a network, you can install an optional interface
board.
You can install the following interface boards in your
printer:
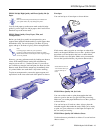
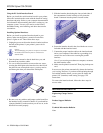
Using Macintosh Interface Boards
If you are planning to install the LocalTalk board, you will
also need two LocalTalk Locking Connector Kits (DIN-8
version). Attach one connector box to the AppleTalk
interface on the printer and the other to the printer port on
the Macintosh. Then attach the LocalTalk cable between the
two connector boxes. For more information, see the
instructions that came with the connector kits.
If you install the Ethernet board connected to a thin coaxial
(10BASE2) cable, and the printer is the last device on the
network, you need to obtain a 50-ohm terminator. The
Ethernet transceiver is included on the EPSON Ethernet
board, so you do not need an adapter box for the printer.
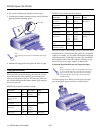
Type of interface board Model number Compatibility
Serial C823051 PC
32KB serial C832071 PC
32KB parallel C823101 PC
LocalTalk C823121 Macintosh
Twinax C823151 PC
Coax C823141 PC
Ethernet C823461 Macintosh/PC