EPSON Stylus COLOR 800
1/97
EPSON Stylus COLOR 800 - 7
Setting Default Options in Windows 3.1
Follow these steps:
1. Double-click the Control Panel icon in the Main group.
2. Double-click the Printers icon.
3. Select EPSON Stylus COLOR 800 from the list of printers
and click Setup.
You see the Main printer settings dialog box. Any changes
you make will become the default settings for all your
applications and documents.
Printing from a Macintosh
When you set up a new printer for your Macintosh, you
need to check the page setup for documents in each
application you use. You can then click the print icon or
choose Print from the File menu. You see a dialog box that
lets you choose which pages to print, the number of copies,
and other options. The settings that describe your print
job—whether you want to use color or black ink, for
example—are part of your printer driver software.
Follow these steps to check printer settings from your word
processor or other Macintosh software:
1. Choose Page Setup from the File menu. You see the Page
Setup dialog box.
2. Choose your paper size and other page setup options and
click OK.
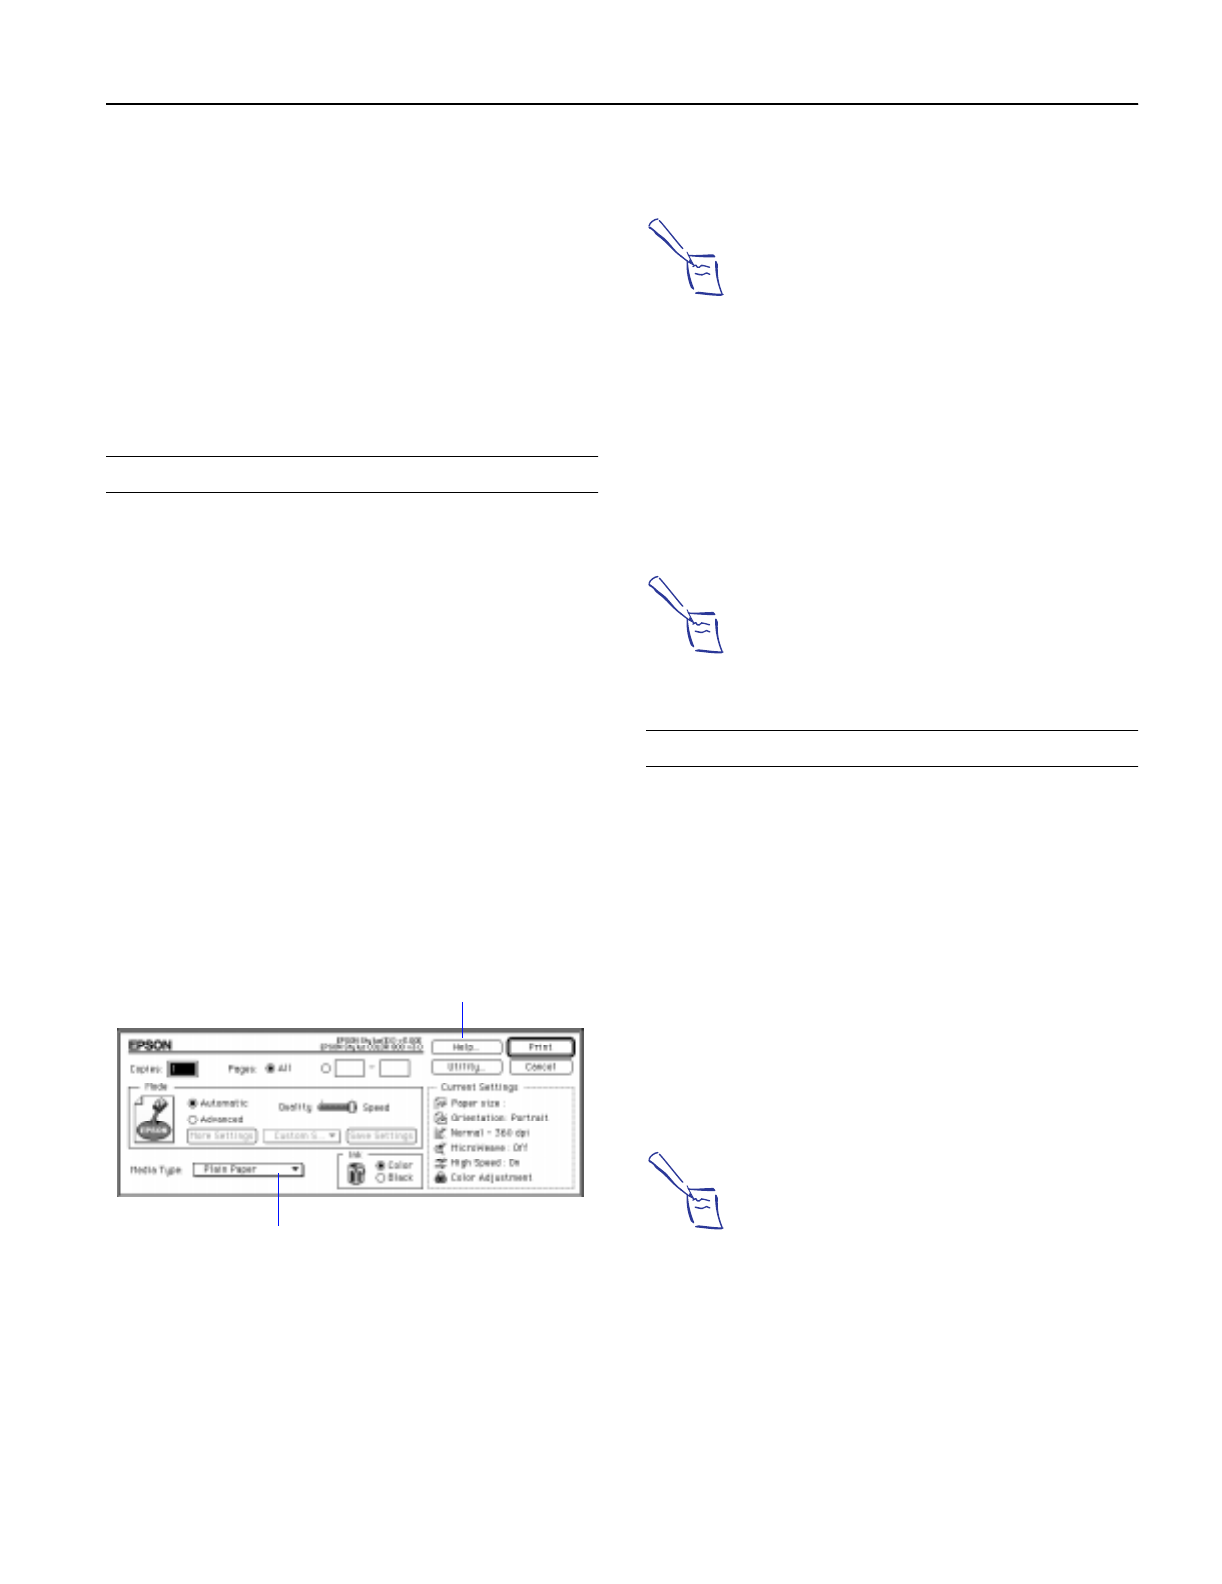
3. Choose Print from the File menu or click the Print icon in
your application. You see a dialog box like the following:
4. Choose the number of copies and indicate which pages
you want to print.
5. Make sure the Mode option is set to Automatic. This is the
easiest way to get good printing results for all kinds of
documents, on all types of paper.
6. Choose the Media Type you want to print on. See page 14
for guidelines on choosing paper.
Note:
For printing at the highest resolution (SuperFine quality
at 1440 dpi), you need to use one of the photo quality
media.
7. Choose Color or Black ink.
8. Set the slider to Quality or Speed. This lets you choose
between the fastest printing or the highest resolution for
the media you’re using.
9. Click Print when you’re finished checking your settings.
If you chose background printing when you set up your
printer, you can continue working while your document is
printing.
Note:
On the Macintosh, printer settings are saved with your
document, but you can’t save them from one application to
another. You’ll have to check your settings each time you
open a new application. If you want to reuse settings, you can
create document templates for your favorite applications.
Managing Print Jobs in Windows
Your Windows printer software includes two management
utilities: the Spool Manager and Status Monitor.
❏ The Spool Manager starts automatically when you send a
job to the printer. It allows you to print in the background
while you continue to work on your computer and to
queue jobs to print at a later time. If you’re using your
printer on a network, it also handles multiple print jobs
that come in at the same time.
❏ The Status Monitor, which is available only if you’re
using Windows 95, also starts automatically when you
send a job to the printer. It displays in the lower right
corner of your screen to alert you about printer and ink
status, as described on page 9.
Note:
The Status Monitor doesn’t work if you’re printing over a
network.
Using the Spool Manager
The Spool Manager works like the Windows Print Manager.
❏ To open it while you’re printing, click the Spool Manager
icon that appears on the Taskbar (Windows 95) or at the
bottom of your desktop (Windows 3.1).
Click for more information
about printer settings.
Click to see list of
media types.


