


36 Printing From Start to Finish
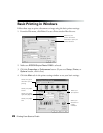
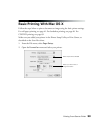
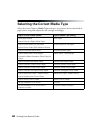
9. Select the type of paper you loaded as the Media Type setting. See page 40.
Note: If you can’t choose your paper type, check your Page Setup settings to
make sure you selected the correct paper size and source. (See page 34.)
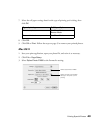
10. For the ink setting, select Color (for color documents and black and white
photographs) or Black (for black text documents).
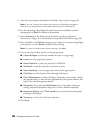
11. Select Automatic as the Mode setting for the best results printing basic
documents or images. (For instructions on using Advanced mode, see page 38.)
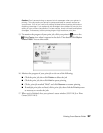
12. Move the slider to the Quality setting to print images or documents using higher
print quality, or to the Speed setting for faster printing.
Note: For more information about printer settings, click Help.
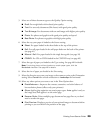
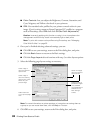
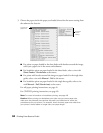
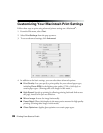
13. You can also choose these options in the pop-up menu:
■ Copies & Pages, to select the number of copies or a page range
■ Layout, to select page layout options
■ Output Options, to save your print job as a PDF file
■ Scheduler, to specify a time for a document to print
■ Paper Handling, to reverse page order and set other page options
■ ColorSync, to select Quartz
®
filters through ColorSync
®
■ Color Management, to select ColorSync, adjust the color controls, change
the gamma setting, or turn off color adjustments by the printer software (see
page 39 for color management details)
■ Expansion (if you selected a Borderless option as the paper size/source
setting), adjusts the borderless image size to remove borders completely
■ Extension Setting, select Thick media here to correct ink smearing when
printing on thick paper
■ Summary, to view a list of all your selections
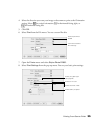
14. Click Print.