the CorelDraw, Corel PhotoPaint, and Adobe swatches. For a complete description on how to use
ColorSure to get perfect spot colors, see appendix C.
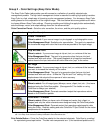
Group 2 - Color Settings (Advanced Mode)
Overview
This tab gives you access to all of the color management controls available in PowerDriver
Supra
1800 XG
8
. Color correction allows you to create transfers from all kinds of images, from
photorealistic images to spot color logos. For maximum flexibility, PowerDriver
Supra
1800 XG
8
lets
you color correct bitmap and vector elements differently, even if they are in the same graphics file.
For example, if you scan a photograph and import it into CorelDraw, PowerDriver will use the color
management settings that have been selected for Bitmap. If you then add text on top of the
bitmap image, PowerDriver will use the color management settings that have been selected for
Vector. The photograph and the text will be color corrected differently! Why? You can now
sublimate images with realistic photographic backgrounds that have vivid spot color text.
Vector and Bitmap Explanation
Bitmaps are a grid of pixels. Bitmaps come from digital cameras, scanners, and photo CDs.
Bitmaps can also be created in applications like Corel PhotoPaint or Adobe PhotoShop. Bitmaps
have file extensions like GIF, JPG, BMP, and TIF. Vector components consist of shapes, curves,
lines, and text. They are created in programs such as CorelDraw and Adobe Illustrator. Higher
end programs like CorelDraw can combine Vector and Bitmaps into a single image. As a rule of
thumb, if the object in your image is made of curves, text, shapes, or fills, it will be color corrected
using the PowerDriver Vector settings. All other image types will be color corrected based on the
PowerDriver
Supra
1800 XG
8
Bitmap setting.
Bitmap & Vector Options
Intense – This kicks the color intensity and saturation to the extreme. This setting does not try
to keep color accurate; its main goal is to produce deep dark colors. Artwork, graphics, logos,
and text are good candidates for this setting. Some photographs will look good but typically,
this setting is too intense to be used with photographs. This can be set for either Bitmap or
Vector images.
Vivid – This setting is most suitable for images where it is important that the colors are vivid
and contrast well with each other. Artwork, graphics, logos, and text, as well as photographs
of landscapes or still life are good candidates for the Vivid setting. This can be set for either
Bitmap or Vector images.
Saturated - The Saturated setting will make the colors in your image more intense. Saturated
output tries to remain color accurate with a slight bump in intensity.
Realistic (Bitmap ONLY) - This setting is most suitable for reproducing skin tones in scanned
photographs.
Original (Vector ONLY) - This setting is most suitable for reproducing life-like clipart.
ColorSure Checkbox - ColorSure is used to replace specific colors in your image with a spot
color chosen from the ColorSure palette. This resulting spot color enhancement is not affected
by color setting. A ColorSure spot color will ALWAYS print the same. See Appendix C for an
overview of ColorSure.
ColorSure Options
Print Palette Button – Prints the ColorSure palette for the selected substrate. ColorSure is a
method for reproducing exact spot colors. The two main components are: 1) the transferred


