99
5
SETTING THE STARTUP SCREEN
SET–UP
98
AUTO POWER SAVE
SET–UP
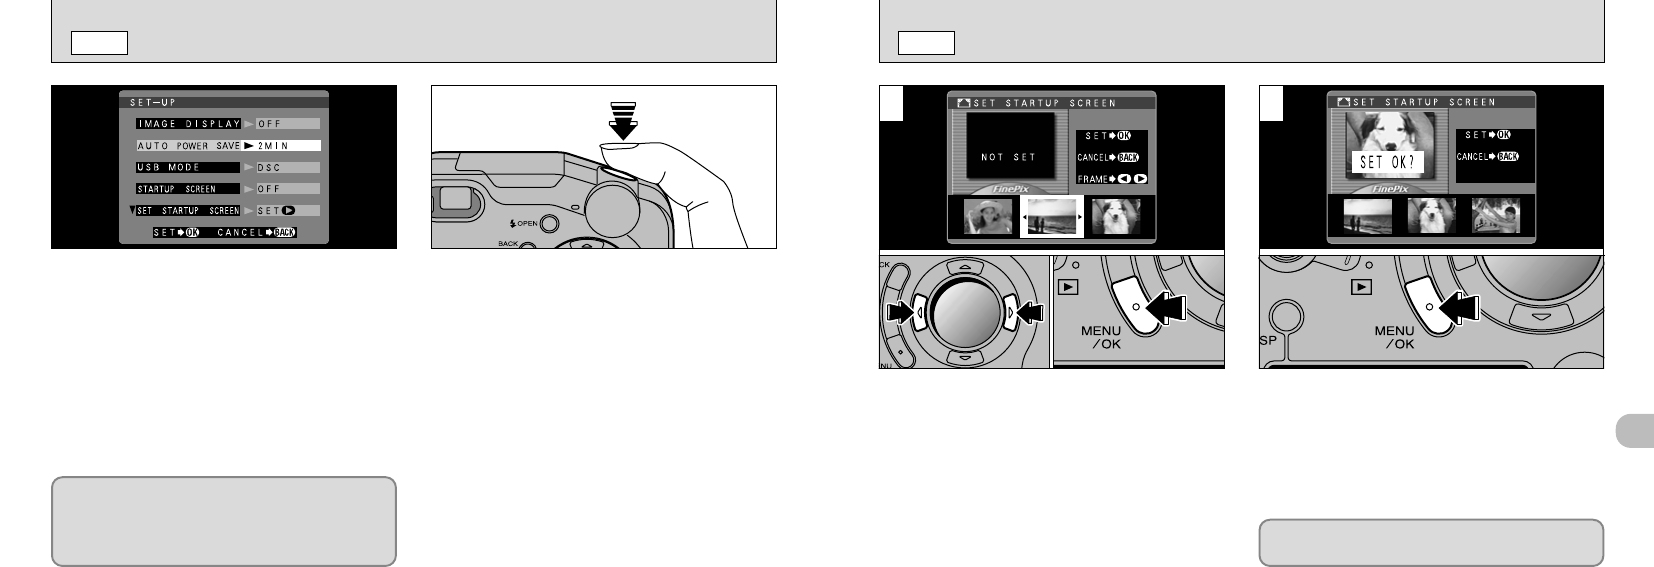
When you switch the camera on, the startup
screen set here appears on the LCD monitor.
➀
When you select “SET STARTUP SCREEN”,
the stored screens are displayed.
➁
Use “d” or “c” to select the image to be set.
➂
Press the “MENU/OK” button to set the image.
➀
The setting confirmation screen appears.
➁
Press the “MENU/OK” button.
1 2
Set the “SET STARTUP SCREEN” setting in
the SET–UP menu to “ON” (➡P.92).
Once you enable this function, the monitor is
temporarily switched off to reduce power
consumption (Sleep mode) if the camera is not
used for about 30 seconds. If the camera is then
left unused for a further time (2 or 5 minutes), it
is automatically switched off. Use this function
when you want to get the maximum possible
running time from the battery.
When the camera is in sleep mode, pressing the
shutter button down halfway brings the camera
back to full operational mode. This is a useful
feature as it allows you to take pictures more
quickly than switching the camera off and then
on again.
●
!
Operation can also be restored by pressing buttons
other than the shutter button.
●
!
When the camera is in Sleep mode, “FinePix” is
displayed on the display panel.
●
!
Auto Power Save is disabled during automatic
playback and when a USB connection is being used.
The Sleep function does not operate when the LCD
monitor is switched off or when the camera is in
Setup or Playback mode. However, if the camera
controls are not used for some time (2 minutes or 5
minutes), the camera automatically switches off.
●
➀
●
➀
●
➁
●
➁
●
➂
●
!
Because the startup screen is displayed in a frame,
part of the image is obscured by the frame.


