


53
Advanced Features
3
52
1
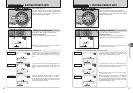
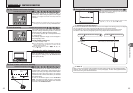
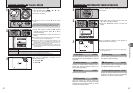
1Set the Power switch to “q”.
2Set the Mode dial to “B”, “m”, “,”, “.”,
“/”, “N”, “M”, “<” or “>” mode.
3Press the “p” button.
2
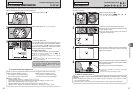
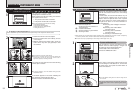
1Press “d” or “c” to select the “J” FinePix
COLOR setting and then press “a” or “b” to
change the setting.
2Press the “MENU/OK” button to confirm the
setting.
01
03
02
01 02
●
!
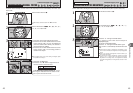
In “r” Movie mode, do not set the “J” FinePix COLOR
setting.
3
●
!
p-CHROME may have little visible effect with some subjects,
such as close-up shots of people (portraits).
●
!
Because the effects on the image differ depending on the
scene being shot in
p-CHROME mode, take pictures in
standard mode as well as this mode. Note that you may not
be able to see any difference on the screen.
●
!
For shots taken in p-CHROME mode or p-B&W mode,
automatic quality adjustment will be suppressed on Exif Print
compliant printers.
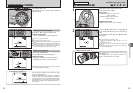
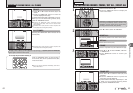
When setting p-CHROME or p-B&W, the icon
appears on the screen.
p-CHROME: æ
p
-B&W: …
The contrast and color saturation are set to standard. Use this mode for normal photography.
p-STANDARD
The contrast and color saturation are set to high. This feature is effective for taking more vivid
shots of subjects such as scenery (blue sky and greenery) and flowers.
p-CHROME
This setting converts the colors in the photographed image to black and white.
p-B&W
J FinePix COLOR
p PHOTO MODE PHOTOGRAPHY
The FinePix COLOR setting is retained even when
the camera is off or the Mode setting is changed.
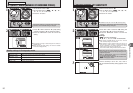
PHOTOGRAPHY MENU OPERATION
PHOTOGRAPHY MENU
3
When you enable the setting, an icon appears in
the top-left corner of the screen.
●
!
The settings available in the menu screen vary depending on
the Photography mode.
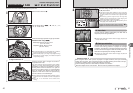
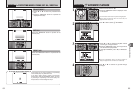
Press the “MENU/OK” button to display the menu
on the screen.
1
1Press “d” or “c” to select the menu item and
“a” or “b” to change the setting.
2Press the “MENU/OK” button to confirm the
setting.
01 02
2
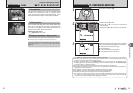
*
Self-timer ➡P.54
Use this setting for taking pictures such as
group shots where the photographer is included
in the shot.
j
Bracketing ➡P.59
Use this setting to photograph the same image
with different exposure settings.
A
White balance ➡P.55
Change the white balance setting to take a
picture with the white balance fixed for the
surroundings and lighting.
H
AF Mode ➡P.57
Set the focusing method.
ç
Photometry ➡P.58
Use this setting for scenes where the
brightness of the subject and background differ
markedly so that the MULTI setting is unlikely
to achieve the desired results.
G
Sharpness ➡P.59
Use this setting to soften or emphasize outlines
or to adjust the quality of the image.
z
Flash brightness adjustment
➡P.59
Change this setting to adjust the amount of light
emitted by the flash to suit the photography
conditions or to achieve a desired effect.