37
Advanced
Features
36
d Flash
f
Continuous
shooting
Selections
_
Photometry
AUTO Auto Flash
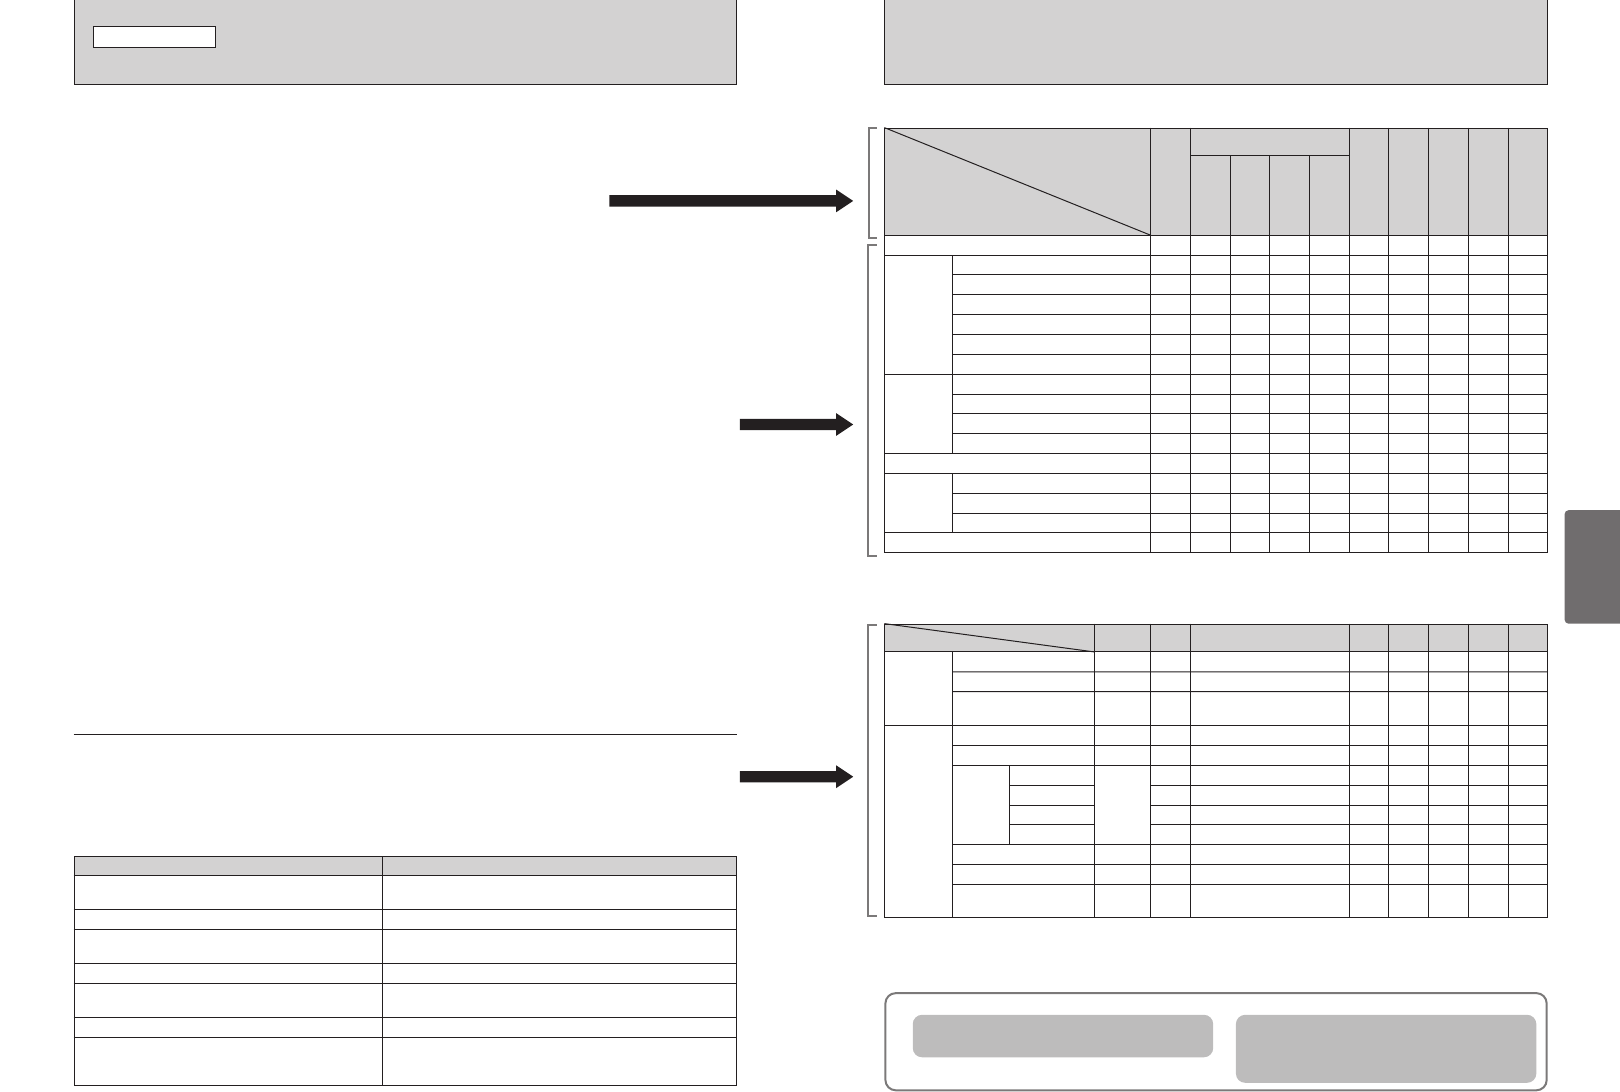
YES NO NO NO NO YES YES YES YES NO
YES YES NO YES NO NO NO NO NO NO
YES YES NO NO NO YES YES YES YES NO
YES YES NO YES NO YES YES YES YES NO
YES YES NO NO YES YES NO YES NO NO
NO NO NO NO YES YES NO YES NO NO
YES YES YES YES YES YES YES YES YES NO
NO NO NO NO NO YES YES YES YES NO
YES YES YES YES YES YES YES YES YES NO
YES NO NO NO NO NO NO NO NO NO
YES YES YES YES YES YES YES YES YES NO
NO NO NO NO NO YES YES YES YES NO
NO NO NO NO NO YES YES YES YES NO
NO NO NO NO NO YES YES YES YES NO
NO NO NO NO NO YES YES YES NO NO
b Red-Eye Reduction
d Forced Flash
YES YES YES YES YES YES YES YES YES NO
v Suppressed Flash
c Slow Synchro
n Red-Eye +Slow
f Top 5-frame
) MULTI
_ SPOT
+ AVERAGE
j Auto Bracketing
k Final 5-frame
h Long-period (up to 40 frames)
e Macro
C-AF ContinuousAF
D Exposure Compensation
B
?
m
PORTRAIT
,
SCENE
.
SPORT
/
NIGHT
NM<>
r
Photography mode
Function
■ List of Functions Available in Each Mode
✽ The flash cannot be used for continuous shooting.
✽ MEGA continuous shooting and high-sensitivity photography cannot be used together.
✽ C-AF and Area AF cannot be used together.
✽1 The factory default resolution for Movie mode is 320 × 240 pixels.
✽2 AUTO can only be set in “B” mode.
✽3 The focus mode cannot be changed by the menu in the “B” mode (➡P.23).
✽ High-sensitivity photography cannot be used together with MEGA continuous shooting.
✽ Area AF cannot be used together with C-AF.
Menu
Options
* Self-timer
A White Brance
H
Focusing
AUTO
AF(CENTER)
AF AREA
MF
YESOFF
AUTO
AUTO
±1/3EV
NORMAL
0
YES YES YES YES YES NO
NO NO YES YES YES YES NO
YES
✽3
NO YES YES YES YES NO
YES
✽3
NO YES YES YES YES NO
NO NO YES YES YES YES NO
NO NO YES YES YES YES NO
NO NO YES YES YES YES NO
NO NO YES YES YES YES NO
NO NO YES YES YES YES NO
j Bracketing
G Sharpness
z Flash
(brightness adjustment)
B
Factory
Defaults
?
NM<>
r
■ List of Menu Options Available in Each Mode
When shutter speed and aperture adjustments alone do not give the correct exposure.
When the image is too bright
Lower the
S sensitivity setting.
When the image is too dark
Raise the S sensitivity setting.
Use flash or the brightness adjustment
function.
TAKING PICTURES — SELECTING THE CAMERA SETTINGS
STILL IMAGE MODE
Consider the scene you are photographing and the sort of image you want to
achieve when you specify the camera settings. A general guide to the procedure
is given below.
1
Select the Photography mode (➡P.38-42, 58, 59).
B
All settings other than the Quality, ISO sensitivity and FinePix color are
specified on the camera.
? Select the best Scene Position setting (mPORTRAIT, ,SCENE,
.SPORT or /NIGHT) for the scene being shot.
N, M, < Allows you to change the aperture or shutter speed setting so that the
action is frozen, so that the flow of the motion is conveyed, or so that
the background is out of focus.
> Allows you to adjust all the camera settings yourself.
r Shoots a movie.
2
Specify the Required Photography Function Settings (➡P.43-50).
e
Macro Use these functions for close-up shots.
d
Flash Use the flash for shots in dark locations or for backlit
subjects, etc.
f
Continuous shooting Allows you to take a series of continuous shots or to
use auto bracketing (with exposure compensation).
C-AF Continuous AF Use this mode for shots of moving subjects.
)
Photometry Use this mode for shots where the brightness of the
subject and background differ markedly and the light is
not metered as desired.
D
Exposure compensation
Using the AE exposure as a reference value of 0, this
function brightens (+) or darkens (–) the shot.
3
Take the Photograph (check the exposure and focus ➡ adjust
the shot composition ➡ press the shutter button down fully).
★
You can Use the Menus for More Detailed Settings (➡P.28-30, 51-57).
The table below provides a number of sample settings. You can achieve any number of other effects
by using the settings effectively. Try changing different settings to see what kind of shots you can take.
To achieve this result Sample settings
To express the motion of the subject (the flow of time)
Set the Mode dial to “M” and select a slow shutter speed. (Use a
tripod to avoid camera shake.)
To freeze the subject's movement
Set the Mode dial to “M” and select a fast shutter speed.
To make the subject stand out by having the background
out of focus
Set the Mode dial to “<” and select a wide aperture setting.
To get a very large depth of focus
Set the Mode dial to “<” and select a narrow aperture setting.
To prevent the image having a red or blue cast due to
the light source
Change the “White balance” setting in the photography menu.
To avoid missing snapshot opportunities Take pictures in AUTO mode (see “Using the Camera”).
To prevent the subject from being overexposed or
underexposed and to show the substance and textures
of the subject clearly.
Use exposure compensation.
Select (+) if the background is pale and (–) if the background is
dark.
FinePix
Photo mode
1M
AUTO
✽2
p-STANDARD
YES
YES
YES YES YES YES YES
YES
✽1
NOYES YES YES YES YES
YES YES YES YES YES YES NO
y Quality
S ISO
J FinePix color


