


ADVANCED
65
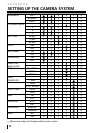
SETTING UP THE CAMERA SYSTEM
DATE/TIME
• This alters the time and date stored with the images.
• The DATE/TIME will only be displayed on the LCD monitor.
When you print the image, the DATE/TIME will not be printed.
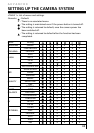
• Range: 2002 ~ 2100 year (leap years and months are corrected automatically).
• The default is 2002/01/01 00:00
• You will need to check and select the correct Date/Time when : The camera is
used for the first time. The batteries have been removed.
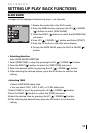
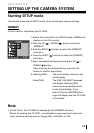
1.Turn the camera power on.
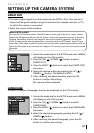
2.Rotate the mode dial to the SETUP mode and a MENU
will display on the LCD monitor.
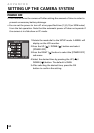
4.Press the UP ( ) / DOWN ( ) button to select
[DATE / TIME].
5. Move to [DATE / TIME] sub menu by using the RIGHT
( ) button.
• Selecting DATE
In step 5, select [DATE] by pressing UP ( ) / DOWN
( ) button and press OK button.
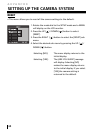
• Selecting TIME
In step 5, select [TIME] by pressing UP ( ) / DOWN
( ) button and press OK button.
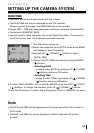
6.To select YEAR / MONTH / DAY or HOUR / MINUTE, press the LEFT ( ) / RIGHT
( ) buttons. To change the numbers, press UP ( ) / DOWN ( ) button.
7.Press the OK button to confirm the setting at the [DAY] or [MINUTE] sub menu.
Note
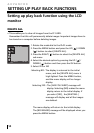
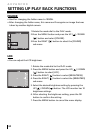
• The DATE and TIME will be displayed on the lower end of the LCD monitor in
PLAY mode.
• The DATE and TIME will not be displayed in SHOT mode and will not be
printed.