


40 hp photosmart 812 user’s manual
Selecting images to be e-mailed
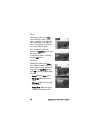
1 Turn the camera on, then press the Share button.
2 Use the Left/Right arrows to scroll to the image you want to
e-mail.
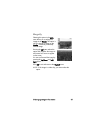
3 Use the Up/Down arrows to scroll to the e-mail address that
you want.
4 Press OK. A check mark appears next to that option. (You
can select more than one e-mail address or print option for
an image.)
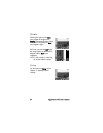
5 Scroll to other images by using the Left/Right arrows and
repeat steps 3 and 4 to select e-mail addresses.
6 When you are finished selecting all the images you want to
have e-mailed, press the Share button.
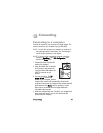
7 The next time you connect the camera to your computer,
images are unloaded to your computer, and the images you
selected for e-mail will be uploaded to the special HP
website. An e-mail message will be sent to every address
that you had selected for each image. See “Connecting” on
page 41 for information about connecting the camera to a
computer.
NOTE Video clips cannot be selected for e-mail in the Share
menu.
NOTE The images in your camera are not e-mailed to
anyone directly as attachments. Rather, a message is sent
to one or more e-mail addresses that you can specify in
the camera’s Share menu. The message contains a web
link where the recipient can view your images. From that
web page, the recipient can do things like reply to you or
print the image. This makes it easy for people who use
different e-mail programs to be able to see your images
without the difficulty of dealing with e-mail attachments.