


24
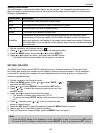
PLAYBACK
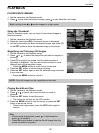
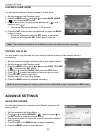
Setting Photo Effect
You can change or correct photo effect directly on the camera. The changed/corrected photos can
then be viewed or printed directly without the need to transfer them onto computer for further photo
editing or enhancement.
Photo Effect Description
B&W Convert color photo into black & white photo.
Sepia Add sepia tones to photo to make it looks like old photo.
Neg. Art Convert photo color into its opposite color.
Mosaic Turn photo into a series of mosaic tiles.
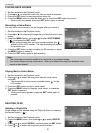
PhotoRite
PhotoRite is an advanced image processing technology for automatic photo
enhancement. Photos processed with PhotoRite will have a more well-balanced
color and exposure, and details in the scene can be seen more clearly. Problems
that PhotoRite can fix are backlit, under-expose, poor contrast, uneven-illumination
and color shift.
1. Set the camera to the Playback mode (
640
320
160
).
2. Press
640
320
160
or
640
320
160
to select the photo that you want to change its effect.
3. Press the MENU button, then press
640
320
160
or
640
320
160
to select EFFECT.
4. Press
640
320
160
or
640
320
160
to select an option, and then press the SET button.
• The photo with the selected effect will be saved as a new file.
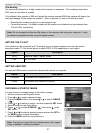
SETTING THE DPOF
The Digital Print Order Format (DPOF) setting allows you to select images on the memory card
for printing and specify the number of print copies in advance using the camera. This is extremely
convenient for sending the images to a photo developing service or for printing on a direct print
function compatible printer.
1. Set the camera to the Playback mode .
2. Press the MENU button, using
640
320
160
or
640
320
160
to select DPOF (
640
320
160
)
and press the SET button.
3. Press
640
320
160
or
640
320
160
to select SINGLE, then press the SET button.
4. Press
640
320
160
or
640
320
160
to select the image you want to print out, and
the SET button.
5. Press
640
320
160
or
640
320
160
to specify the number of copies.
• The number of copies can be set from 0 to 30.
• To cancel this image DPOF setting, set the number of copies
to 0.
6. Press
640
320
160
and then press
640
320
160
or
640
320
160
to set or cancel the date
stamp of current image.
7. Press the SET button to apply the setting or press the MENU button to cancel.
8. Repeat step 4~7 to set other images for printing.
9. After you finished all image settings, press the MENU button to apply it.
Hint:
• To set the DPOF setting for all images in a time, select ALL in step 3 and press the SET button.
• To reset all DPOF settings to initial default, select RESET in step 3 and press the SET button.