45
Applicable to: Camera mode
Besides the normal recording mode, four special recording
methods are available in this camera recorder. They are Pre
Rec, Clip Continuous Rec, Frame Rec, and Interval Rec.
Select the mode from [Rec Mode] in the [Record Set] menu.
* Set using [Main Menu]B[Record Set]B[Rec Mode].
(A Page 64)
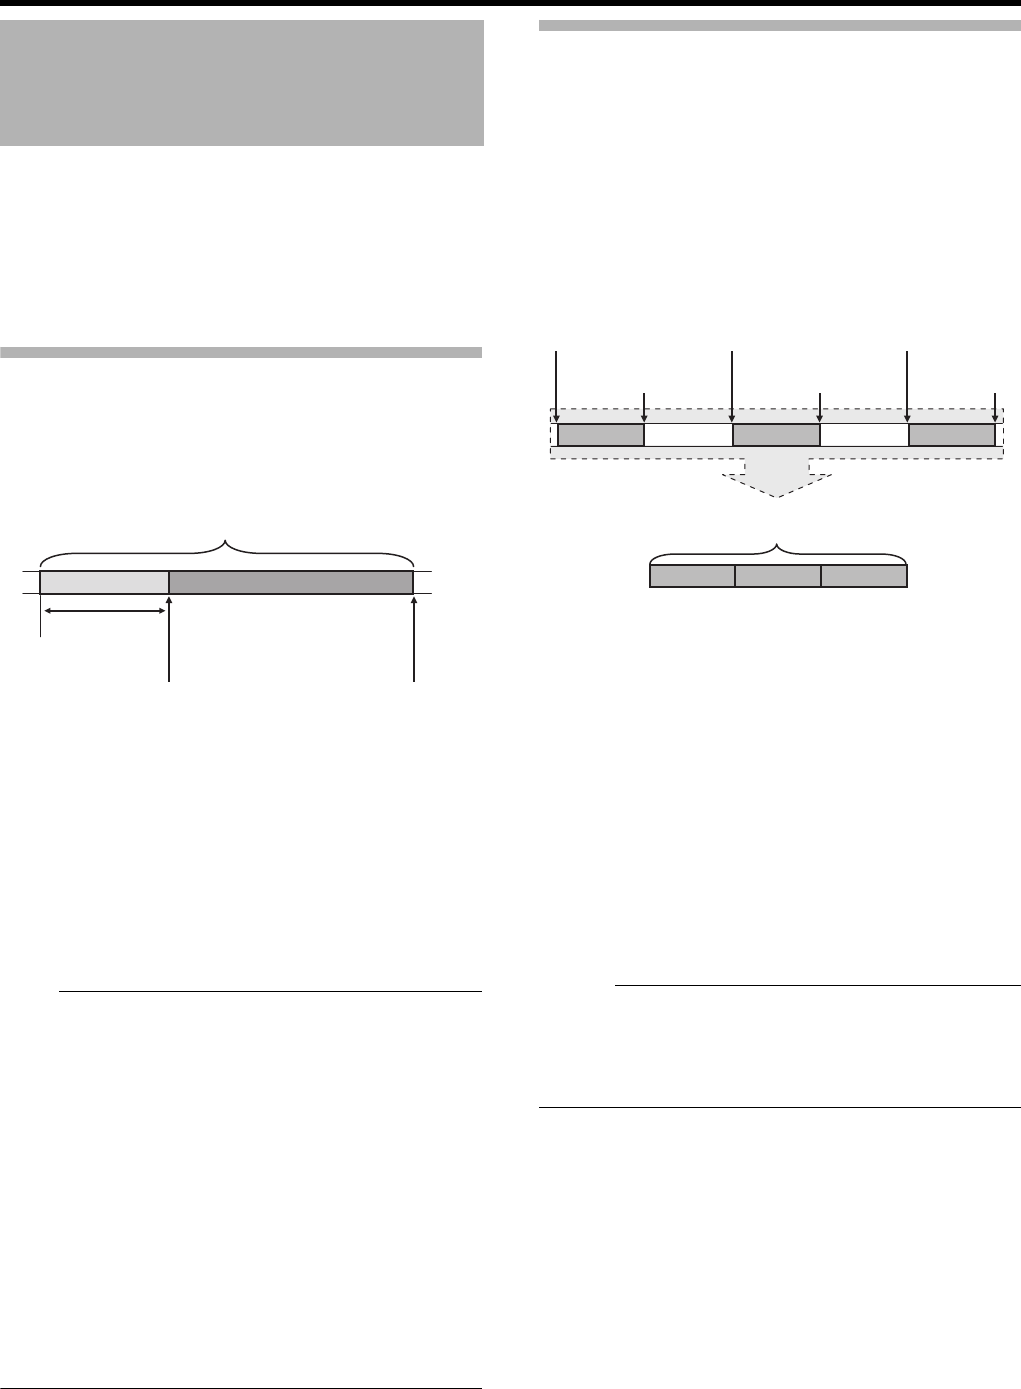
Pre Rec
When starting actual recording while the camera recorder is
in Recording Standby (STBYP) mode, you can start
recording about 5 seconds earlier.
Using Pre Rec allows you to record a complete event without
missing the initial scenes even if you start the recording late.
1
Set [Rec Mode] to
A
Pre Rec
B
. (
A
Page 64)
●
Set [Main Menu]
B
[Record Set]
B
[Rec Mode] to
A
Pre Rec
B
.
●
The status display changes from
A
STBY
B
B
A
STBY
P
B
.
2 Press the [REC] button to start recording in Pre Rec
mode.
●
The status display changes from
A
STBY
P
B
B
A
REC
P
B
and
the card slot status indicator blinks in green.
●
Press the [REC] button again to pause recording. The
display changes from
A
REC
P
B
B
A
STBY
P
B
and the card
slot status indicator lights up in green.
Note :
●
When the interval between start and stop recording is short,
A
STBY
P
B
may not be displayed immediately after recording
is complete.
ARECPBBASTBYPB (STBY blinks in red) B ASTBYPB is
displayed.
●
When the SDHC/SDXC card becomes full during recording,
recording stops and
A
STOP
B
is displayed.
●
Video and audio before the above mentioned time may not
be recorded after recording starts in the following cases.
• Immediately after power on
• Immediately after recording stops
• Immediately after switching from Media mode to
Camera mode
• Immediately after setting [Rec Mode]
• Immediately after the end of Clip Review
• Immediately after changing file format
• Immediately after changing video format
Clip Continuous Rec
In normal recording, when the recording stops, the image,
audio, and accompanying data from the start till the end of
the recording are recorded as one AclipB on the SDHC/
SDXC card.
This mode allows you to consolidate several rounds of Astart-
stop recordingB into one clip.
Example : In normal recording, three clips are generated as
Recording 1, Recording 2, and Recording 3.
However, recording in this mode generates only
one clip.
1
Set [Rec Mode] to
A
Clip Continuous
B
.
●
Set [Main Menu]
B
[Record Set]
B
[Rec Mode] to
A
Clip
Continuous
B
. (
A
Page 64)
●
The status display changes from
A
STBY
B
B
A
STBY
C
B
.
2 Start recording. (Recording 1)
●
Press the [REC] button to start recording in Clip Continuous
mode.
●
The status display changes from
A
STBY
C
B
B
A
REC
C
B
and
the card slot status indicator blinks in green.
3 Pause recording.
●
Press the [REC] button again to pause recording. The
display changes from
A
REC
C
B
B
A
STBY
C
B
(yellow text).
●
The card slot status indicator continues to blink in green.
Memo :
●
When the user button assigned with
A
Rec Stop
B
is pressed
while the camera recorder is paused (STBY
C
), the display
changes from
A
STBY
C
B
(yellow text)
B
A
STBY
C
B
(blinking
yellow text)
B
A
STBY
C
B
(white text). A
A
clip
B
is generated.
The card slot status indicator lights up in green. (
A
Page 19)
Special Recording
Completed Clip
(Recorded video and audio)
Press [REC]
(Recording starts)
Recording starts
5 seconds earlier
Press [REC]
(Recording stops)
Completed Clip
(Recorded video and audio)
Recording 1 Recording 2 Recording 3
Recording 1 Recording 2 Recording 3
Press [REC]
(Recording starts)
Press [REC]
(Recording pauses)
Press [REC]
(Recording resumes)
Press [REC]
(Recording pauses)
Press [REC]
(Recording stops)
Press [REC]
(Recording resumes)
GY-HM150U.book Page 45 Monday, September 5, 2011 1:48 AM


