


EN49
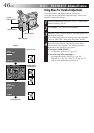
01
04
03
06
02
05
<
PROTECT
>
EXIT
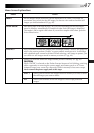
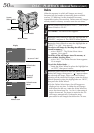
01
04
03
06
02
05
<
PROTECT
>
EXIT
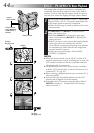
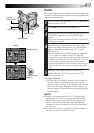
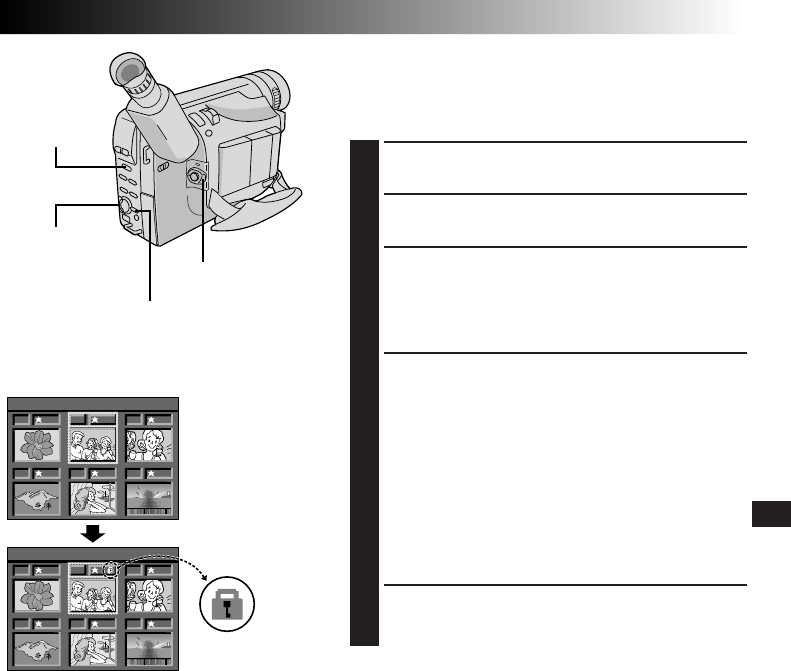
A padlock mark
appears.
PROTECT Menu
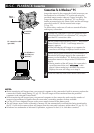
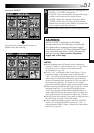
Power Switch
MENU Button
Select Wheel
System
Select Switch
Display
Protect
This mode helps prevent accidental erasure of images. Put
a padlock mark next to the desired still image, and that still
image cannot be deleted.
1
Set the System Select Switch to “D.S.C.”, and set the
Power Switch to “PLAY”.
2
Press MENU. The Menu Screen appears.
3
Rotate the Select Wheel to move the highlight bar to
“PROTECT”, and press it. The PROTECT Menu
appears.
•If you do not want to perform “Protect” for any still
image, go to step 5.
4
Rotate the Select Wheel to move the frame to the
desired still image, then press it. The padlock mark
appears above the selected image. The “Protect”
function is set.
•On the Protect Menu, all still images are displayed
six at a time. To perform “Protect” for the still
images that come after the 6th one, rotate the Select
Wheel to move the frame from Index No. 1 to No.
6, then rotate it further downward. The frame is
placed automatically on the 7th still image. Images
after the 7th one can also be accessed in the same
way.
5
Rotate the Select Wheel upward to place the
highlight bar on “EXIT”, then press it twice. The
Menu Screen closes.
To remove “Protect” . . .
.... perform steps 1 through 3, rotate the Select Wheel to
move the frame to the desired still image with the
padlock mark, then press it. The padlock mark located
above the still image disappears and the image is no
longer protected. When finished removing protection,
perform step 5.
NOTES:
●
To move the frame from Index No. 7 to 6, place the
highlight bar on “EXIT” by rotating the Select Wheel
upward. Rotate the Select Wheel further upward. The
frame is moved to the 6th still image automatically.
Perform the same procedure for still images that follow
the 13th one.
●
On the Protect Menu, a star mark is displayed next to a
still image you shot in the FINE mode.