


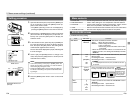
E22
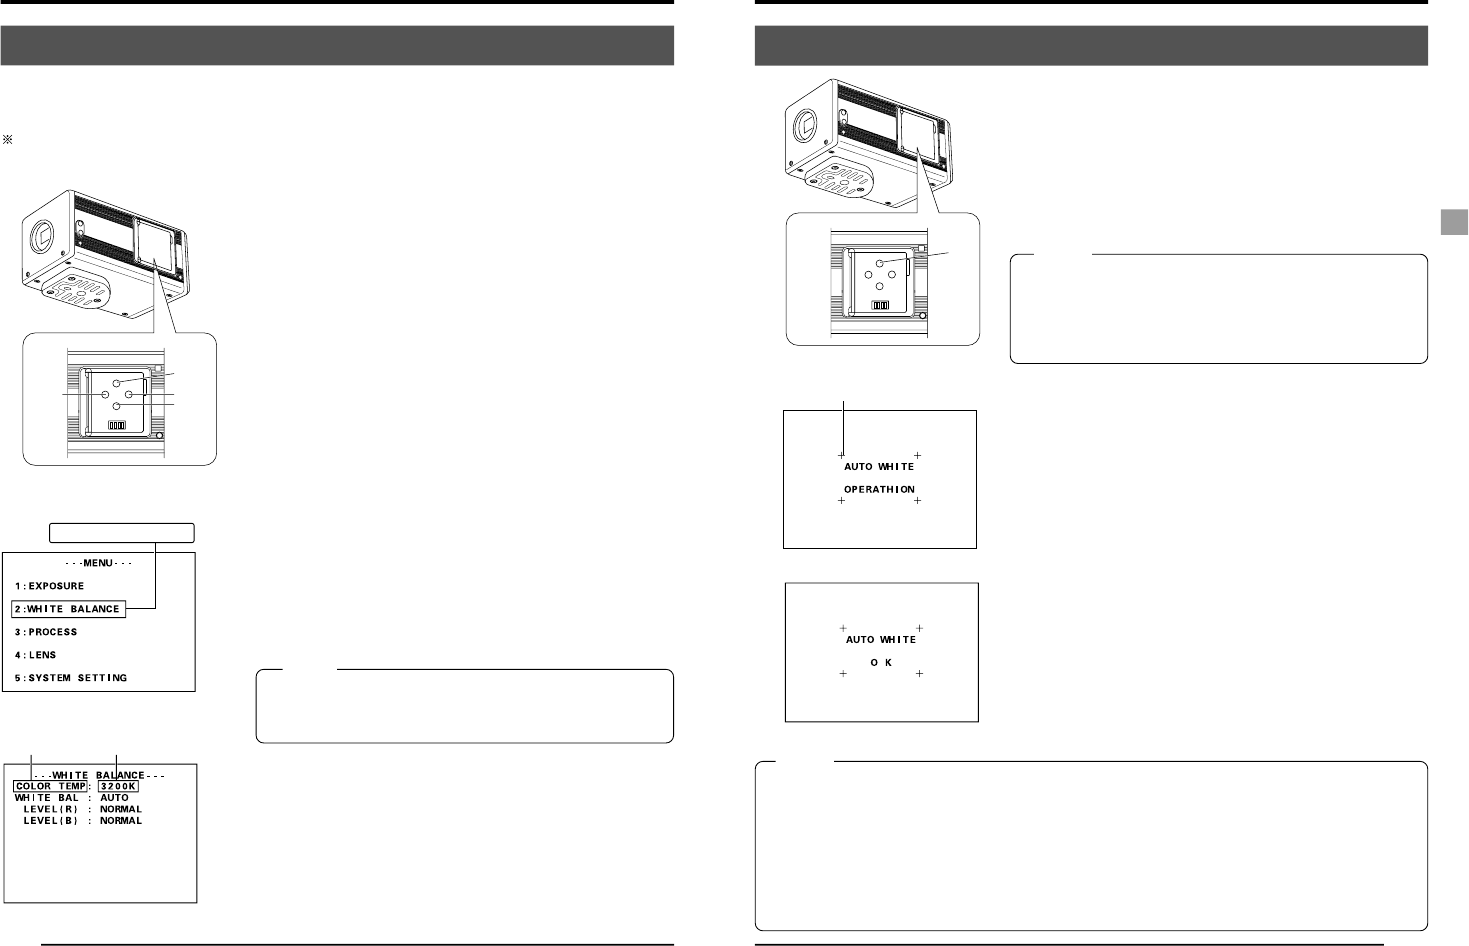
White balance adjustment
Since the colour of light (light temperature) changes depending on the light source, readjust the
white balance (AUTO WHITE) when the light source of the object changes.
In the digital output mode, white balance adjustment should be performed using the special
application software [KY-LINK].
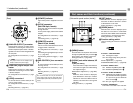
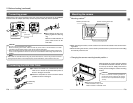
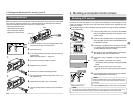
1.
Open the side switch panel, and press the [MENU] but-
ton for 2 seconds or longer. The [MENU] screen ap-
pears on the monitor screen.
2.
Press the [UP] or [DOWN] button to select [2. WHITE
BALANCE] (the text will be displayed in purple when
selected), then press the [SET] button.
The [WHITE BALANCE] screen will appear.
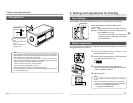
3.
Press the [UP] or [DOWN] button to select [COLOR
TEMP] (the text will be displayed in purple when se-
lected), then press the [SET] button.
The set value will be displayed in purple, indicating that
it can be changed.
4.
Press the [UP] or [DOWN] button to select the setting
depending on the usage environment.
3200K: when using low temperature lighting such as a
halogen lamp, etc.
5600K: when using high temperature lighting under
the sunlight, etc.
Pressing the [SET] button will register the setting in the
main unit memory. The set value will be displayed in
white.
MEMO
Pressing the [MENU] button without pressing the [SET] button
will not register the set value and the unit will return to the
setting prior to the change.
5.
Press the [UP], [DOWN] and [SET] buttons to set
[WHITE BAL] in the [WHITE BALANCE] screen to
“AUTO”.
6.
After pressing the [MENU] button twice to return to the
normal screen, place a white object with the same light-
ing conditions as the object to record, then zoom in to
display white near the center of the screen (more than
80% area of screen).
WHITE BALANCE screen
[UP]
[SET]
[DOWN]
[MENU]
UP/AW
SET
MENU
DOWN
1234
[MENU] screen
Inside window
Select [WHITE BALANCE]
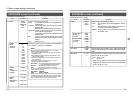
Item Set value
3. Settings and adjustments for shooting (cont
’
d)
E23
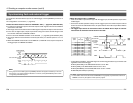
● Error display
When the auto white balance cannot be set, one of
the following error messages will appear and the unit
will return to the normal screen.
NG: OBJECT (bad object)
Displayed when the object consists of little whiteness
or when the colour temperature is not correct.
Change to a white object and redo the white balance.
ERROR: LOW LIGHT (shortage of light)
Displayed when the lighting is too dark. Brighten the
lighting and redo the white balance.
ERROR: OVER LIGHT (excessive light)
• Displayed when the lighting is too bright. Close the
lens iris or lower the brightness and redo the white
balance.
• When the shutter speed is set to a slow speed, it may take
a while before the white balance operation is completed.
• With the factory setting, it may take up to 13 seconds de-
pending on the subject. (When setting the shutter speed to
1 s takes maximum of 1 minute 45 seconds.)
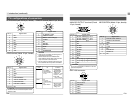
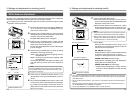
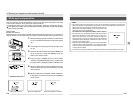
7.
Press the [AW] (Auto White) button.
● When auto white is in operation, the auto-white op-
eration area and [AUTO WHITE OPERATION] will be
displayed on the monitor screen.
● When the white balance is successfully set, [AUTO
WHITE OK] will appear for about 3 seconds on the
screen and the unit will return to the normal screen.
MEMO
• When the colour temperature of the subject changes as the darkness increases, do not change the
illumination. Instead, narrow the lens iris, and take the white balance again by pressing the [AW]
(Auto White) button.
• When a shutter speed exceeding 1 sec is used, it is not possible to launch the auto white balance
function.
Temporarily return the shutter setting to below 1 sec and launch the auto white balance function, or
set the [WHITE BAL] item to “MANUAL” or “PRESET”.
• Pressing the [AW] button in the FREEZE condition, cancels the freeze.
MEMO
Auto white operation completed
UP/AW
SET
MENU
DOWN
1234
[AW]
Auto-white operation area
Auto white in operation
Inside window
3. Settings and adjustments for shooting (cont
’
d)