


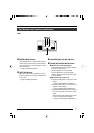
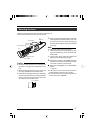


17
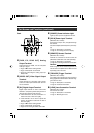
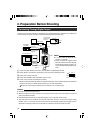
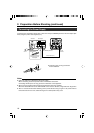
Mounting the Lens
Follow the procedures below when mounting the auto iris lens.
Refer to the ‘instruction manual’ for the lens as well.
Caution
● Perform this when the unit is off. Connecting with
the power on may give rise to malfunction of the
unit.
● When removing the lens mount cap, ensure that
no foreign substances are inside the mount.
● Lenses are not supplied with this unit. Depending
on the lens being used, this unit may be damaged.
As such, ensure to use lens that are 4 mm or be-
low, reference from the lens mount.
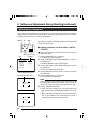
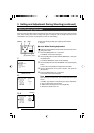
1.
Align and press the threaded portion of the lens
mount against the threaded portion of this unit’s
lens mount and turn the mount fastening ring
clockwise slowly until the lens is firmly attached
to this unit.
Note
To change the position of the lens rotation,
1 First, loosen the mount fastening ring by rotat-
ing it anti-clockwise by 1/4 turn as viewed from
the lens side.
2 Turn the lens gently, adjust the position and
tighten the mount fastening ring again.
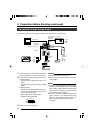
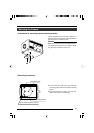
2.
Plug the lens cable into the [LENS] terminal at
the back of the unit and ensure that it is locked.
Iris control is carried out from this unit.
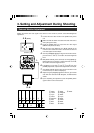
Ⅵ
Setting the “IRIS MODE” of the “EXPOSURE”
Screen
☞ Page 33
● If auto iris lens is to be used and iris control is to
be automatically carried out, set to “AUTO”.
● If auto iris lens is to be used and iris control is to
be fine-tuned, set to “MANUAL”.
4 mm and below
Threaded
Portion
Camera Head
1.
(Male)
Compatible Zoom Lens
T14 x 5.5MD
Lens
Mount Fastening Ring
Lock
2.