


22
WHIAUTO E1T
RATOPE ION
WHAUTO TIE1
OK (3200K)
-- ---CE-WHI TE BALAN
CEBALAN
TPRESE
WH I T E
0
AUTO1
0
LEVEL(R)
LEVEL(B)
LEVEL(R)
LEVEL(G)
LEVEL(B)
SHADING
PAGE BACK
- - - - - -
- - - - - -
- - - - - -
5 / BARS
∞/ AW
SETMENU
1234
[MENU] [SET]
[5]
[∞]
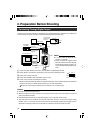
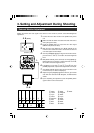
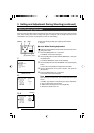
3. Setting and Adjustment During Shooting (continued)
White balance adjustment includes Auto White, Full-time Auto White
(FAW), manual and preset.
Ⅵ
Setting procedures for Auto White (“AUTO1”,
“AUTO2”)
Make sure that the Switch 4 located at the side of this unit is set to
[OFF] (lower side).
1.
Press the [MENU] button for 1-2 seconds.
The “MENU” screen will be displayed.
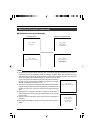
2.
Use the [5/∞] buttons to select “WHITE BALANCE..”, then press
the [SET] button.
The “WHITE BALANCE” screen will be displayed.
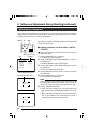
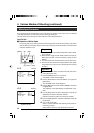
3.
Use the [5/∞] buttons to select “WHITE BALANCE”, then press
the [SET] button.
The set value displayed will start to blink.
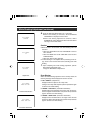
4.
Use the [5/∞] buttons to select “AUTO1” or “AUTO2”, then press
the [SET] button.
5.
Press the [MENU] button for 1-2 seconds.
The normal screen will be displayed.
Note
Upon returning to the normal screen, place a white object with the
same illumination conditions as the object, zoom in to the white
portion at the center of the screen (above 80% within the area).
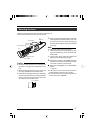
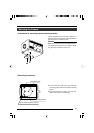
6.
Press the [AW](Auto White) button.
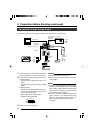
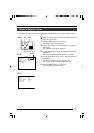
● When auto white is activated, the auto white operation area
and “AUTO WHITE1,2 OPERATION” are displayed on the moni-
tor.
● When white balance is achieved, a rough color temperature as
well as “AUTO WHITE1,2 OK” will be displayed for about 3
seconds before returning to the normal screen.
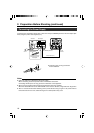
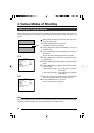
Color of light (color temperature) may vary with light sources. When light source for illumination of object is
changed, adjust white balance (AUTO WHITE) again. Do not place strong reflectors such as metals near
the object. This may cause error in achieving white balance.
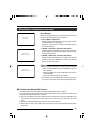
White Balance Adjustment
Auto White Operation Activated
“WHITE BALANCE” Screen
Auto White Operation Ends
Auto White Operation Area
Set ValueItem
Switch 4: [OFF]