


12
Connection/Installation
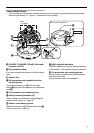
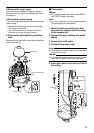
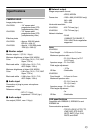
Ⅵ Mounting
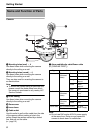
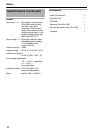
1 Align the shooting direction with the
shooting direction mark (j), followed
by mounting the camera
2 Fasten the camera (x3 locations)
A
Turn the tip of the ceiling mounting bracket such
as by using a screwdriver
B The camera is fastened after the ceiling
mounting brackets are hooked to the ceiling
Memo:
● To remove the camera, perform the above
procedure in the reverse sequence.
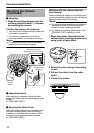
Ⅵ Image Adjustment
After mounting is complete, adjust the video
image while referring to the actual display on the
monitor.
(A [READ ME FIRST])
Ⅵ Mounting the Dome Cover
After video image adjustment is complete, mount
the inner dome and dome cover accordingly.
Installation is complete after the dome cover is
mounted and the protective sheet removed.
(A [READ ME FIRST])
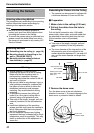
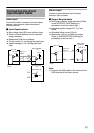
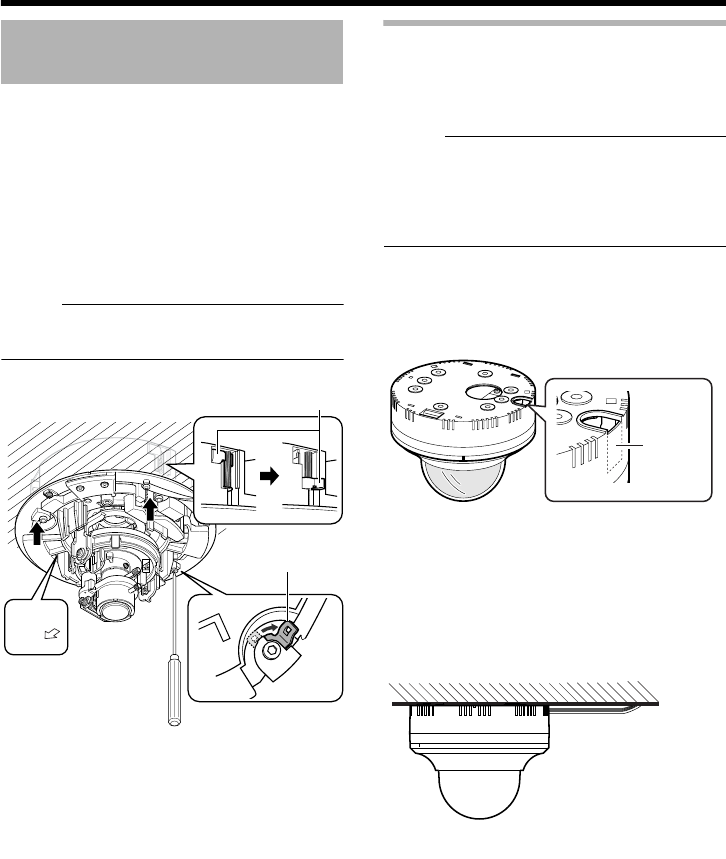
Mounting with the cables pulled out
from the side
When mounting the camera to the ceiling or wall,
you can pull out the cables from the side without
having to make a hole in the ceiling.
Memo:
●
The basic mounting procedures are identical to
those described for “Direct mounting to the
ceiling/horizontal mounting to the wall”.
● For details on mounting, please refer to the
[READ ME FIRST] (sheet) provided.
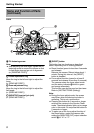
1 Break the portion illustrated by the
dotted lines in the diagram such as by
using a pair of radio pliers
2 Mount the outer casing to the ceiling
or wall
3 Pull out the cables from the cable
outlet
4 Connect the cables
Mounting the Camera
(continued)
FRO
N
T
U
P
1
2
Align with
shooting
direction
Ceiling mounting bracket
(Sections that hook to the ceiling)
Ceiling mounting
bracket (tip)
Break