


8
Getting Started
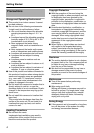
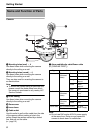
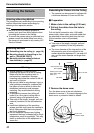
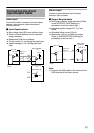
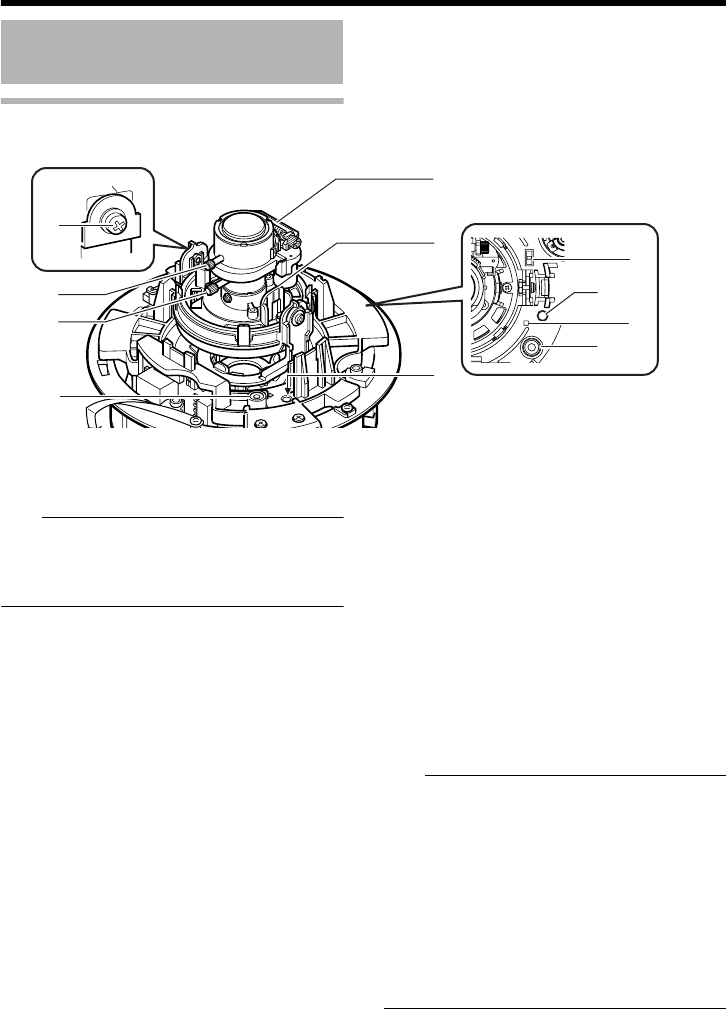
Lens
Q
Tilt fastening screw
Note:
● After adjusting the field angle, tighten the tilt
fastening screw to secure the camera so that
its field angle does not go out of alignment.
(A [READ ME FIRST])
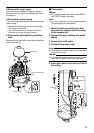
R Focus adjustment ring
Move the ring to the left and right to adjust the
focus.
(A [READ ME FIRST])
S Zoom adjustment ring
Move the ring to the left and right to adjust the
field angle.
(A [READ ME FIRST])
T [MONITOR] terminal (pin jack)
(A [READ ME FIRST])
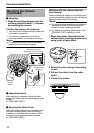
U [RESET] button
This button has two functions as described
below, depending how it is being pressed.
● Reset function (press for less than 2 seconds
and release)
Reboots the camera. Reboot takes about 1
minute. During this interval, the [RESET]
button is disabled.
● Focus adjust function (press for at least 2
seconds and release in less than 5 seconds)
The camera enters the focus adjust mode
and the status indicator V blinks in green
and orange alternately.
This function can also be used on the viewer.
Refer to [INSTRUCTIONS (Setting)].
Note:
● During the focus adjust mode, the screen
may flicker when the electronic shutter is
operating. This is not a malfunction.
● Pressing this button for 5 seconds or longer
switches the camera to the Service Check
mode. The status indicator lights up in orange
color in this mode. Do not press the button for
5 seconds or longer.
● To make use of the focus adjust function of
the Reset button, restart the camera after
setting the [MONITOR OUT] output selection
switch W to ANB or APB.
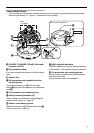
Name and Function of Parts
(continued)
R
T
Y
S
U
X
Q
T
W
V
U